Map Client Roles to User Groups in Keycloak
by Sachin Kabadi, System Analyst
Quick Intro
This guide provides a step-by-step process for administrators who want to streamline client-role-based access management in their Keycloak setup and access user roles from access token in rails app.
The process includes of creating client roles, setting up user groups with child groups, assigning client roles to the child groups and mapping users to these groups.
Prerequisites
Before proceeding, ensure you have the following setup:
-
A Keycloak server running with a "Realm" created, a registered "Client" and a "User".
-
A Rails application configured with Keycloak for single sign-on using the
omniauth-keycloakgem.
If you need guidance on completing these steps, refer to the following blog post:
Lets get started!
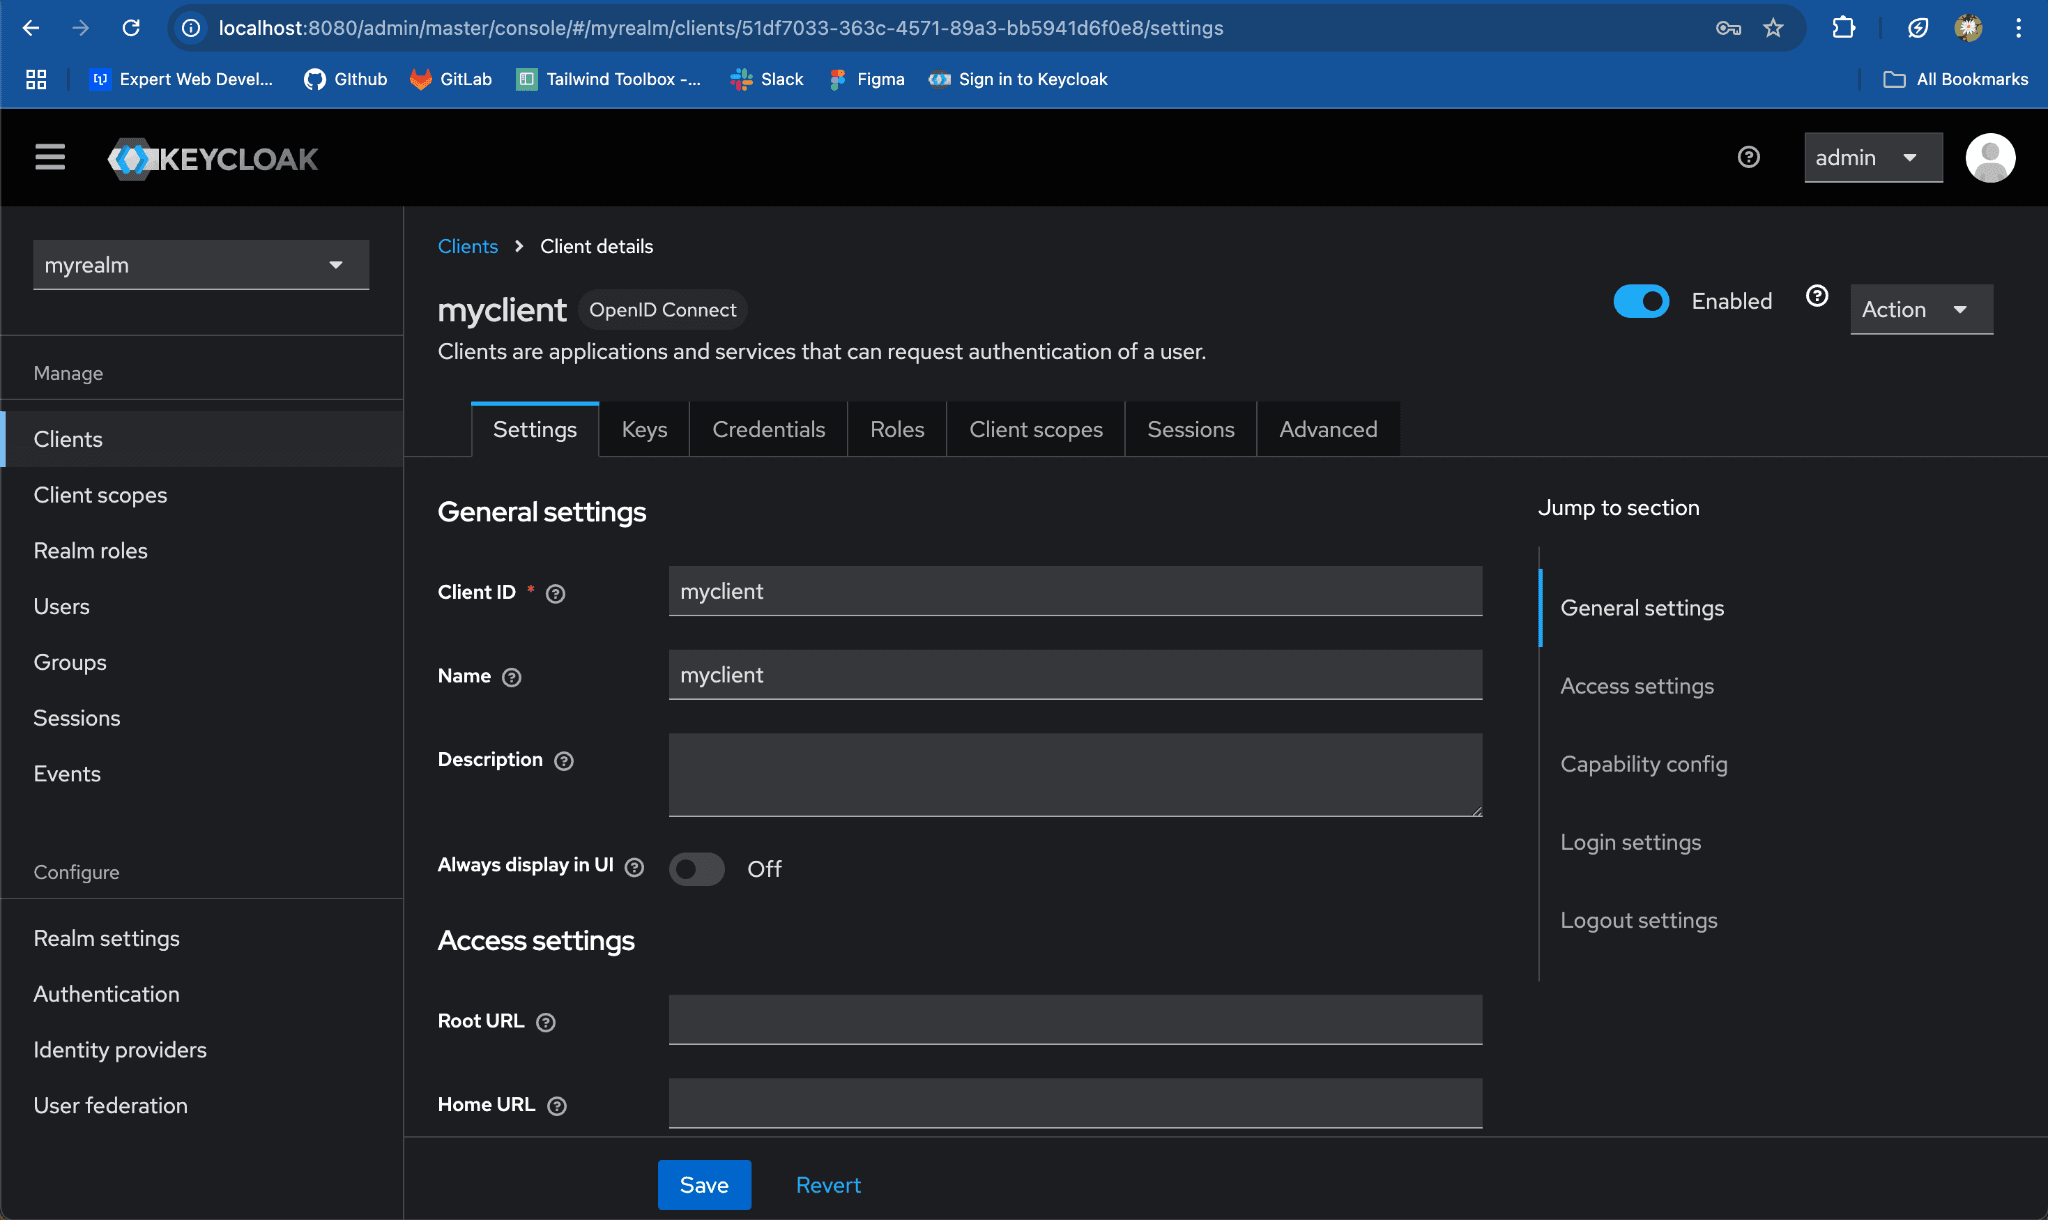
Step 1: Create Roles in the Client
-
Log in to the Keycloak Admin Console.
-
Navigate to the Realm:
-
On the left-hand menu, click on
Realm Settings. -
Select
myrealmfrom the list of realms.

-
Go to the Client:
-
Click on
Clientsfrom the left-hand menu. -
Select the client
myclient.
-
-
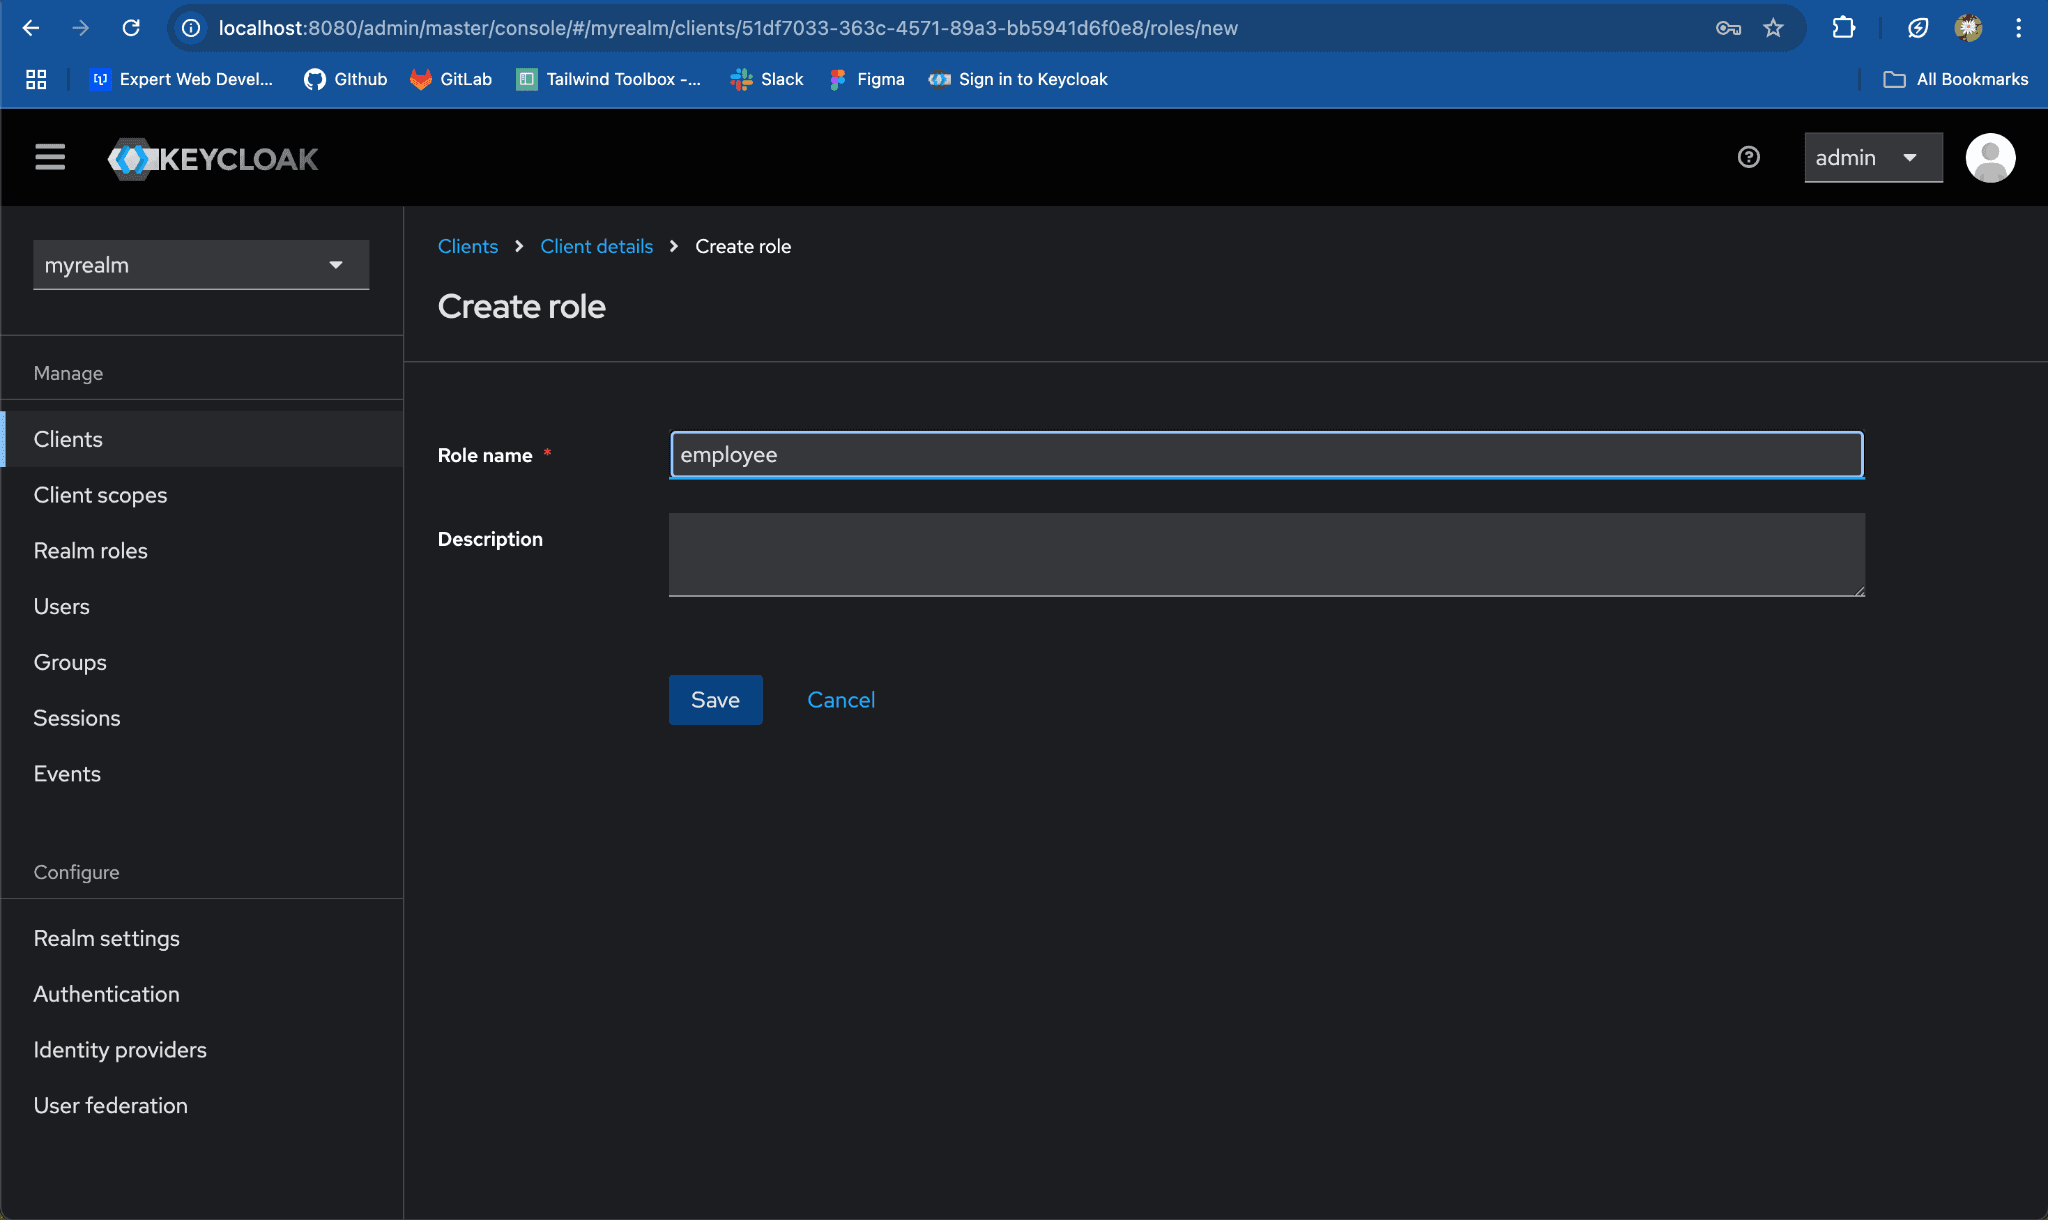
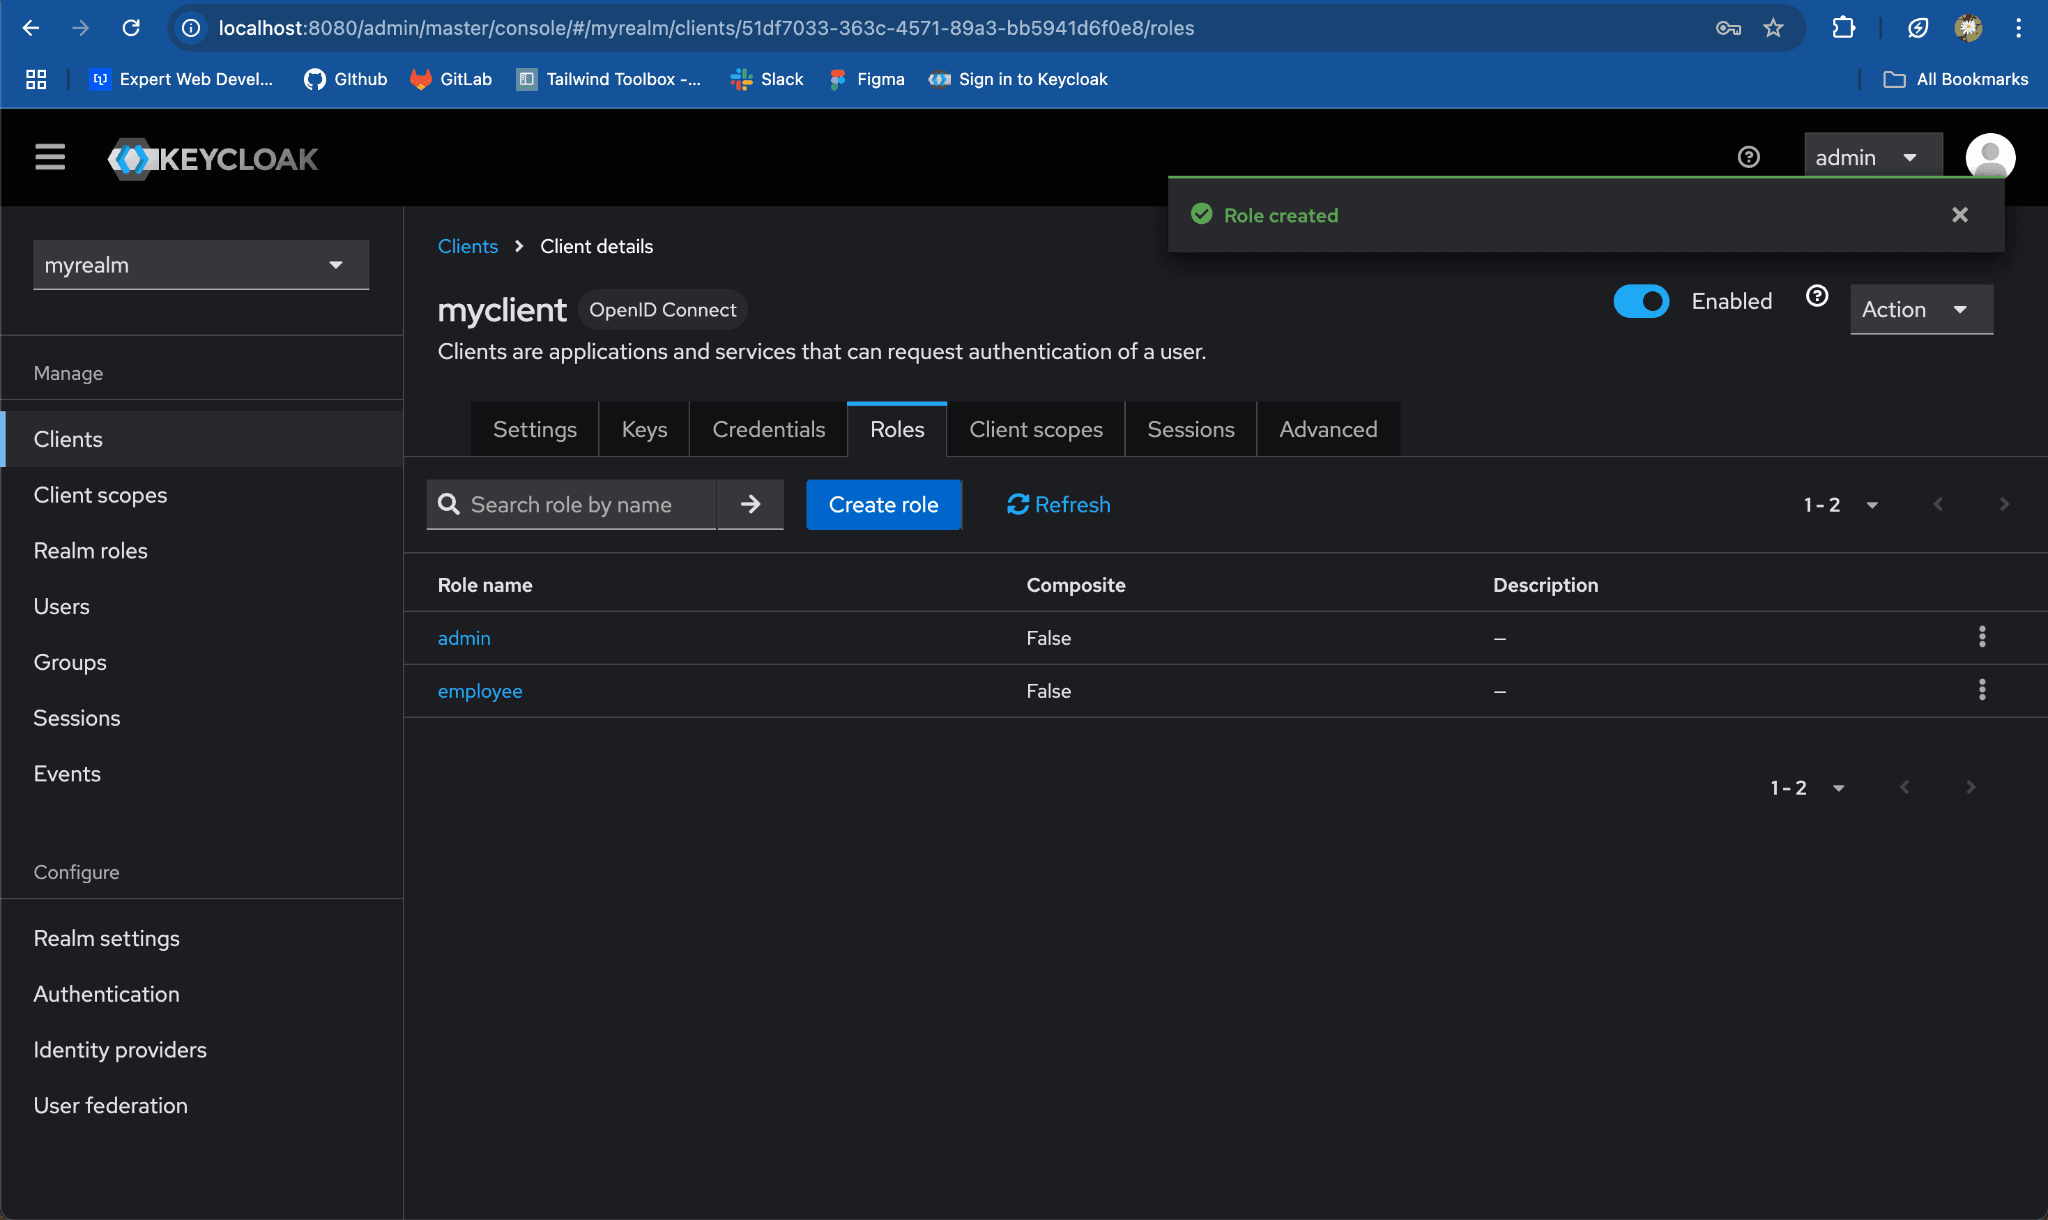
Add Roles:
-
Click on the
Rolestab. -
Click
Create Role.
-

- For
Role Name, enteremployee. ClickSave.
- Repeat the same process to create the
adminrole.
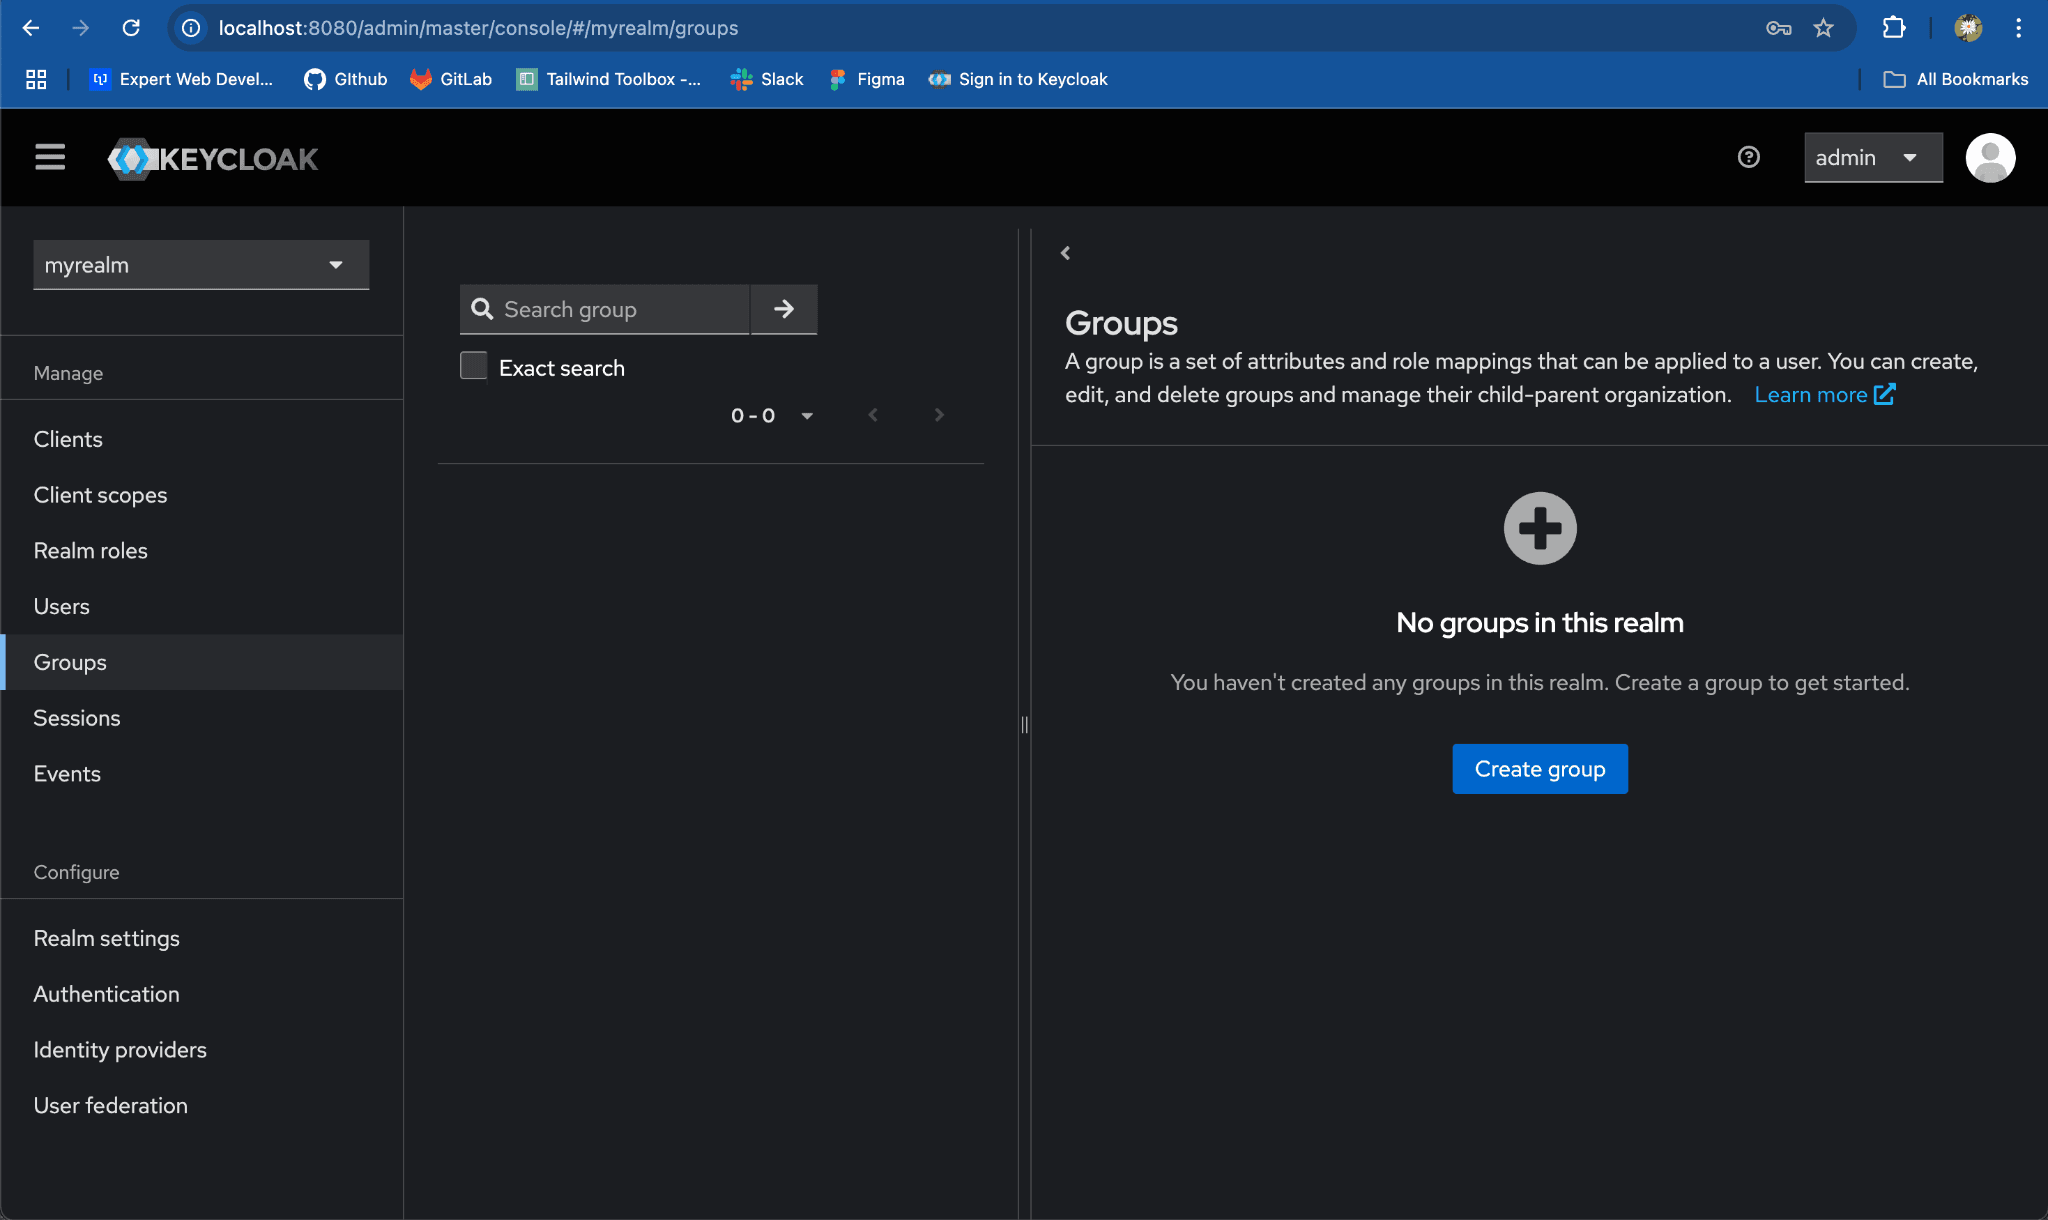
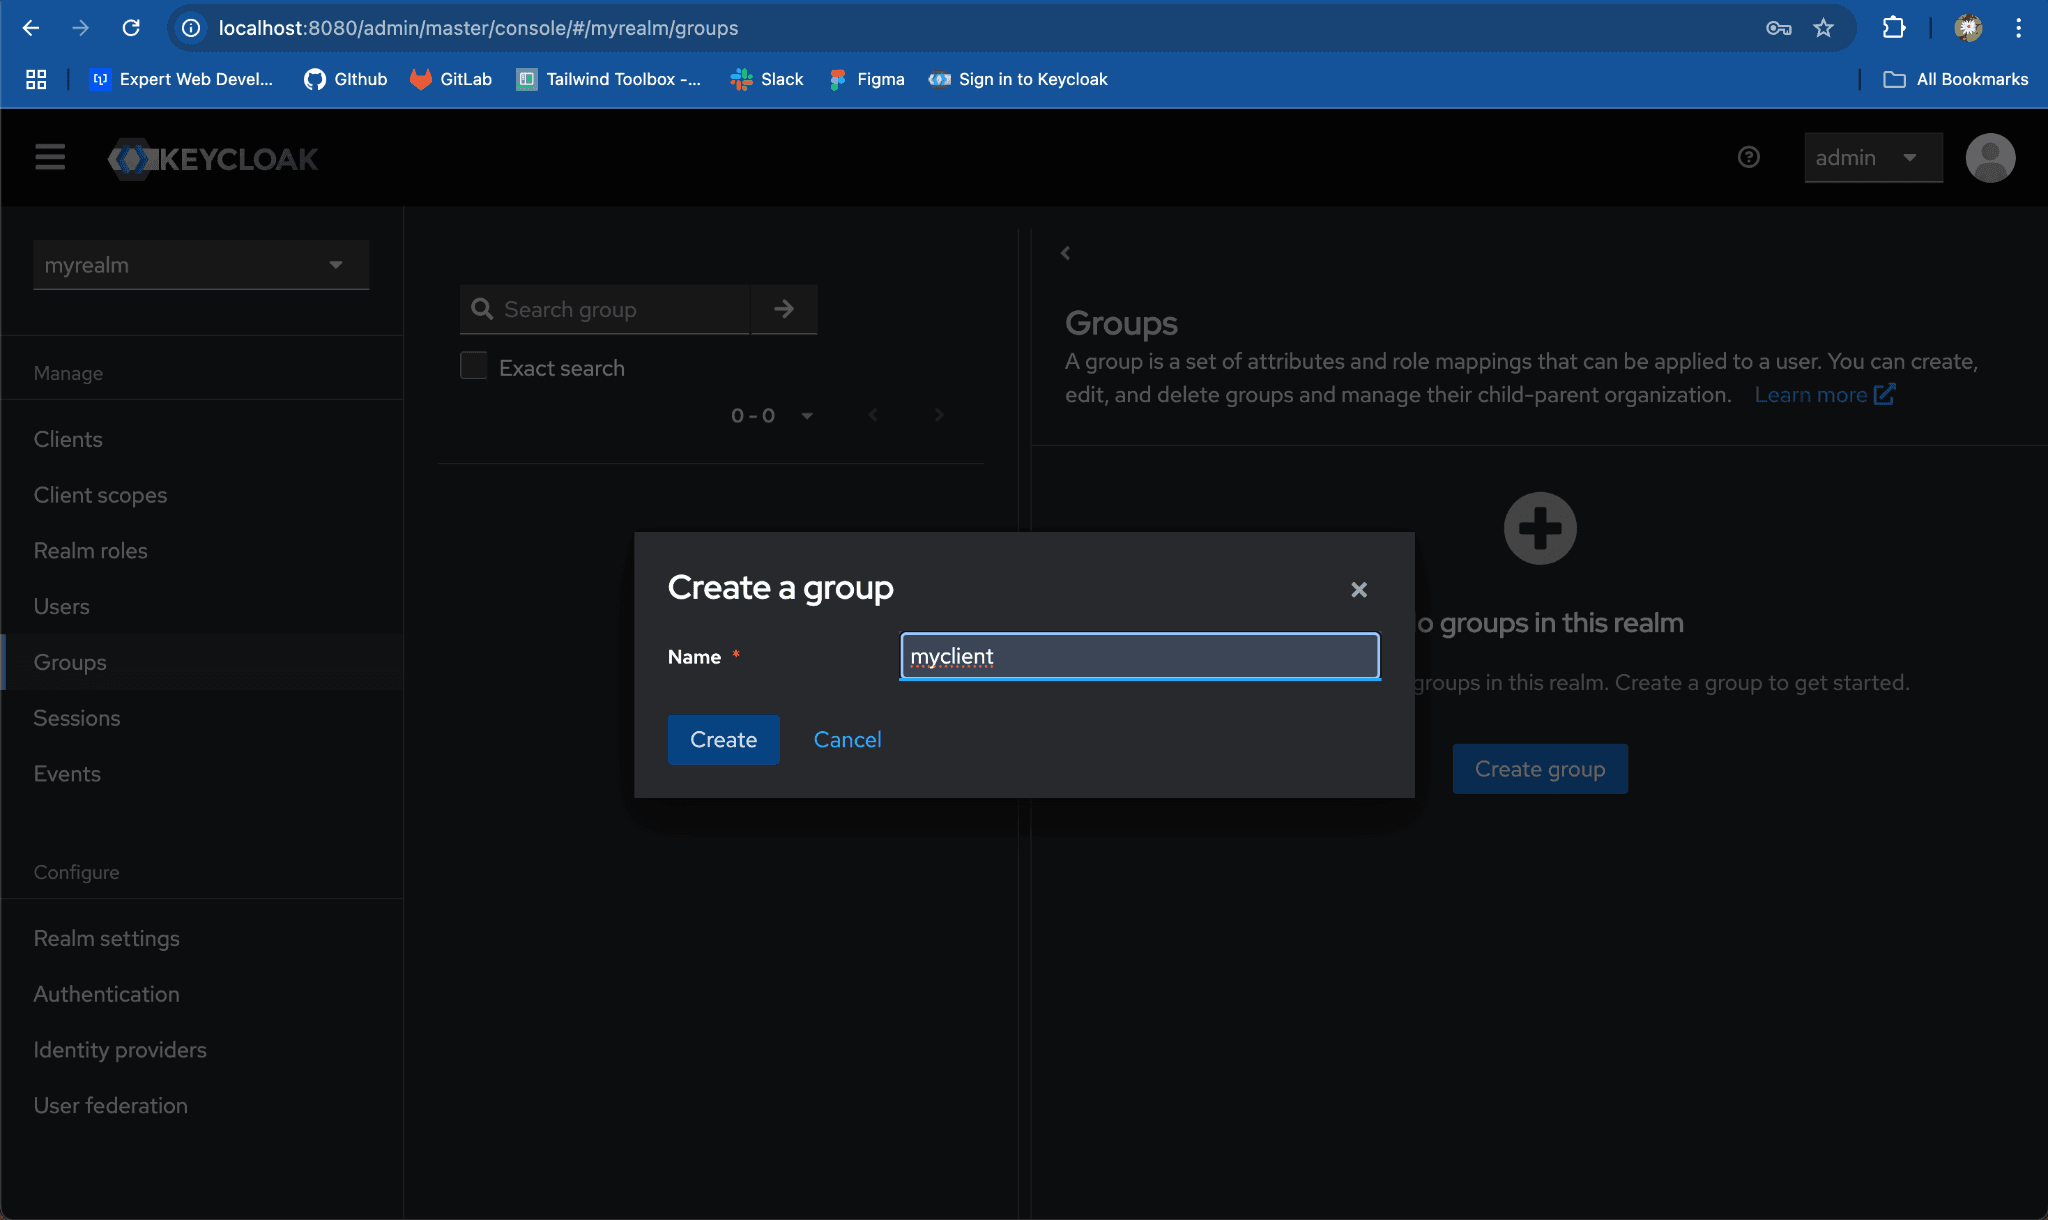
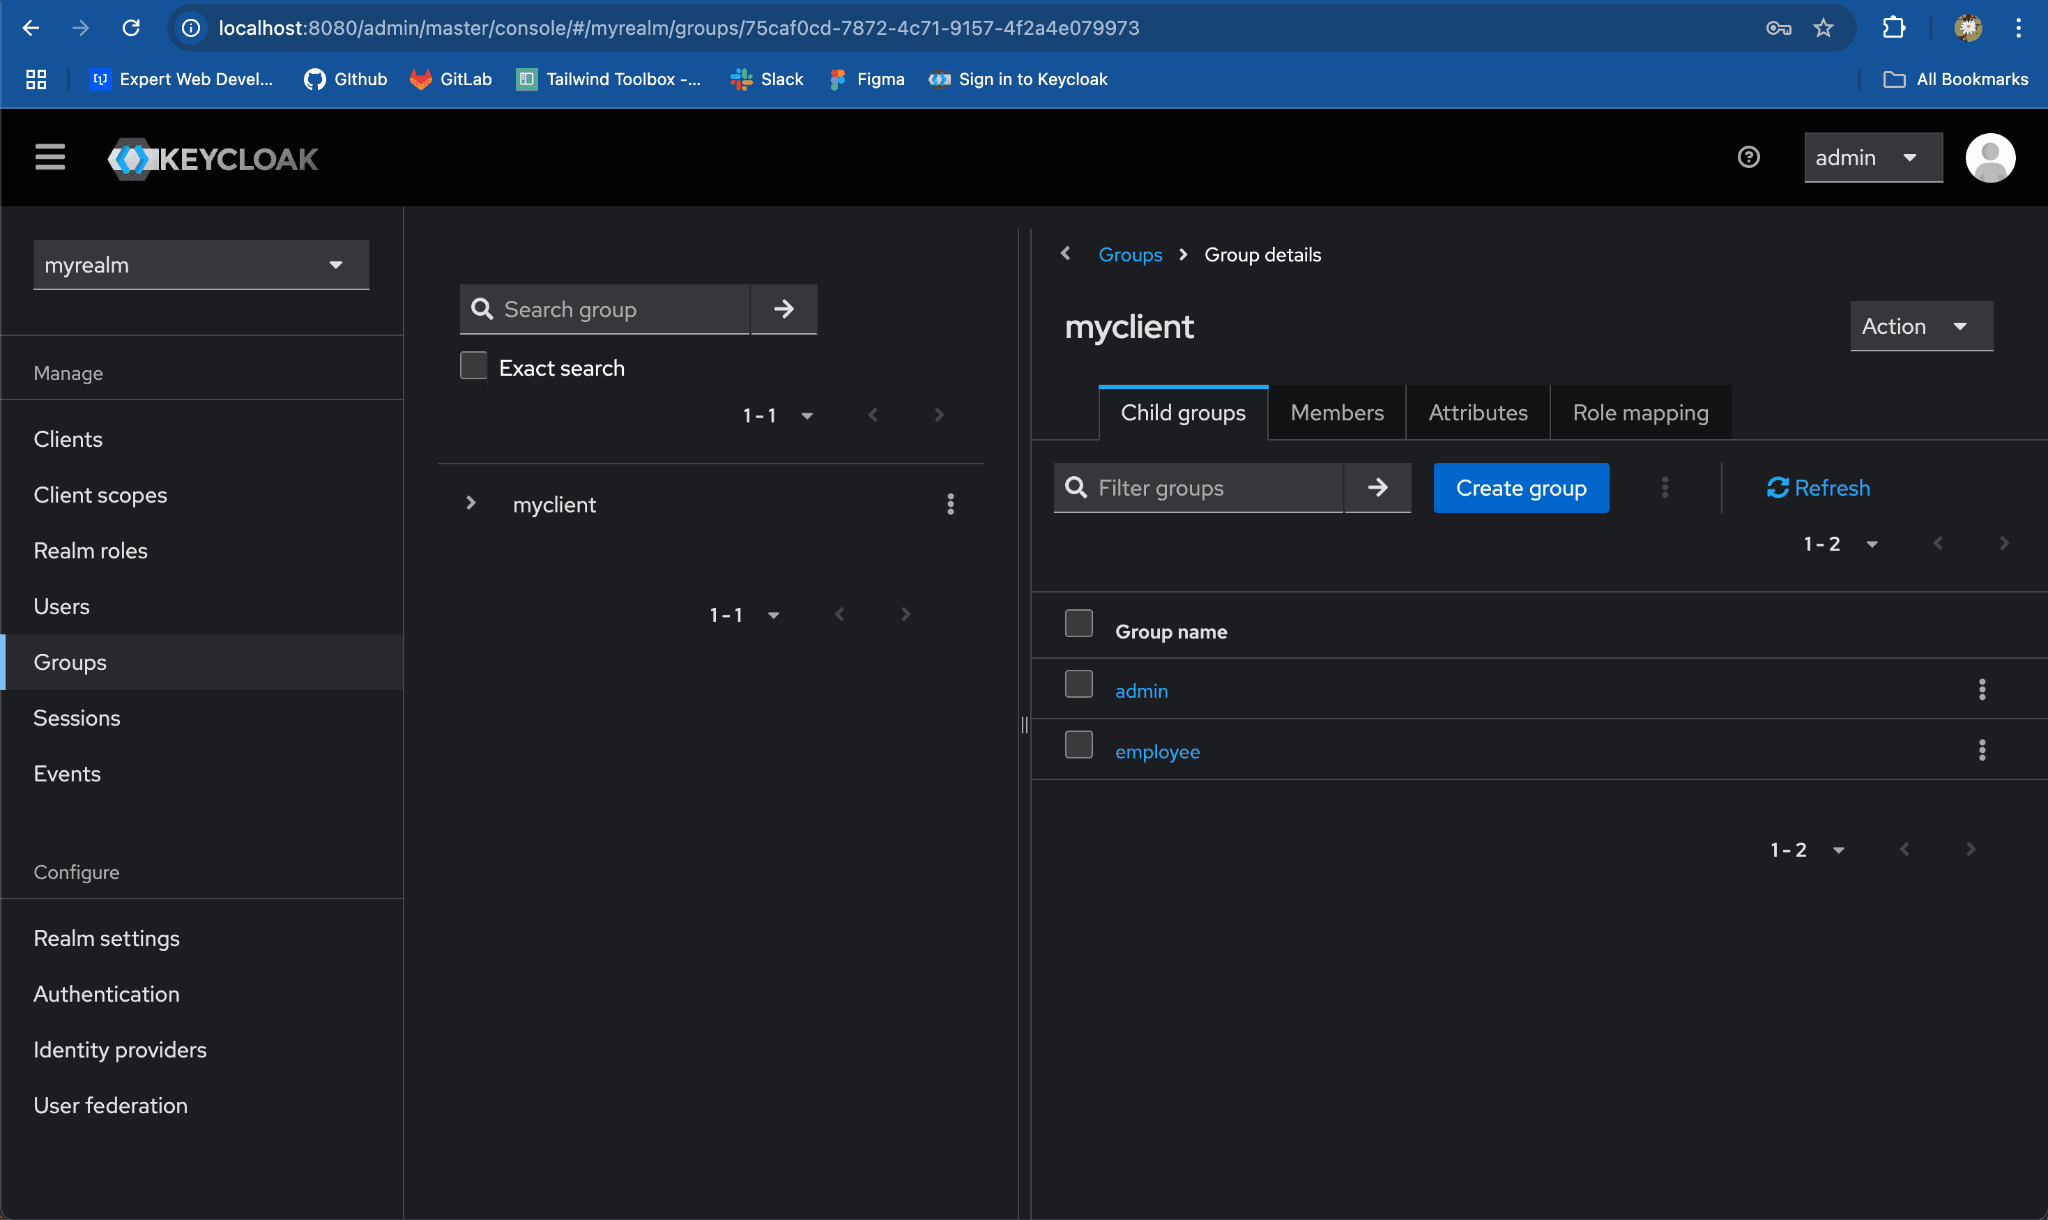
Step 2: Create a Group with Two Child Groups
- Navigate to the Groups Section:
- On the left-hand menu, click on
Groups.
-
Create Parent Group:
-
Click
Create group. -
Enter the Parent group name same as client name, e.g.
myclient, and clickSave.
-
-
Create Child Groups:
-
Click on the parent group
‘myclient‘ from the group list. -
Under the
Child Groupstab, clickCreate groupand add the group name same as client role, e.g.employee. ClickSave.
-
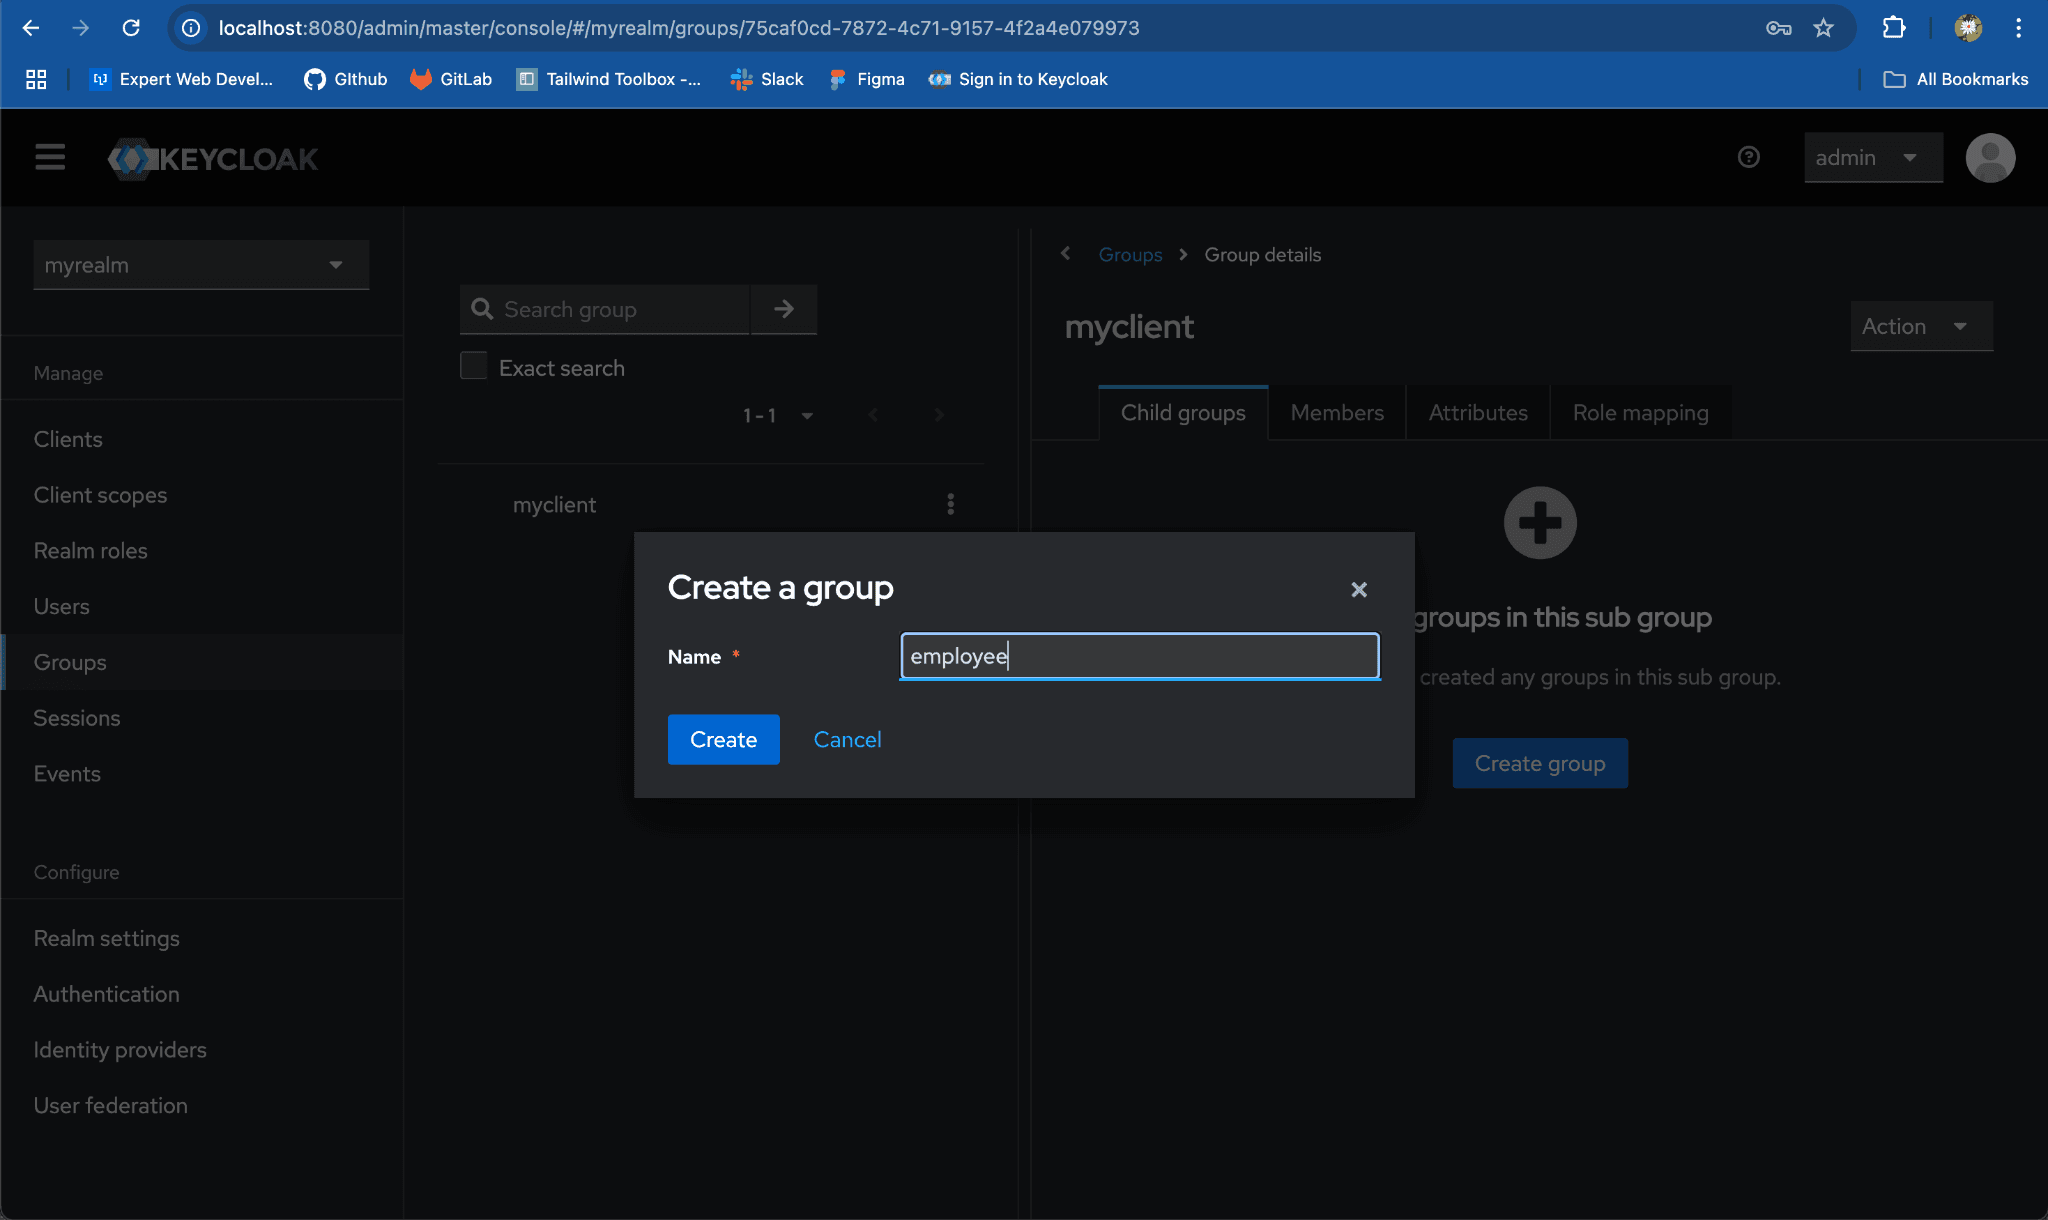
- Repeat the process to create the second child group, e.g.
admin.
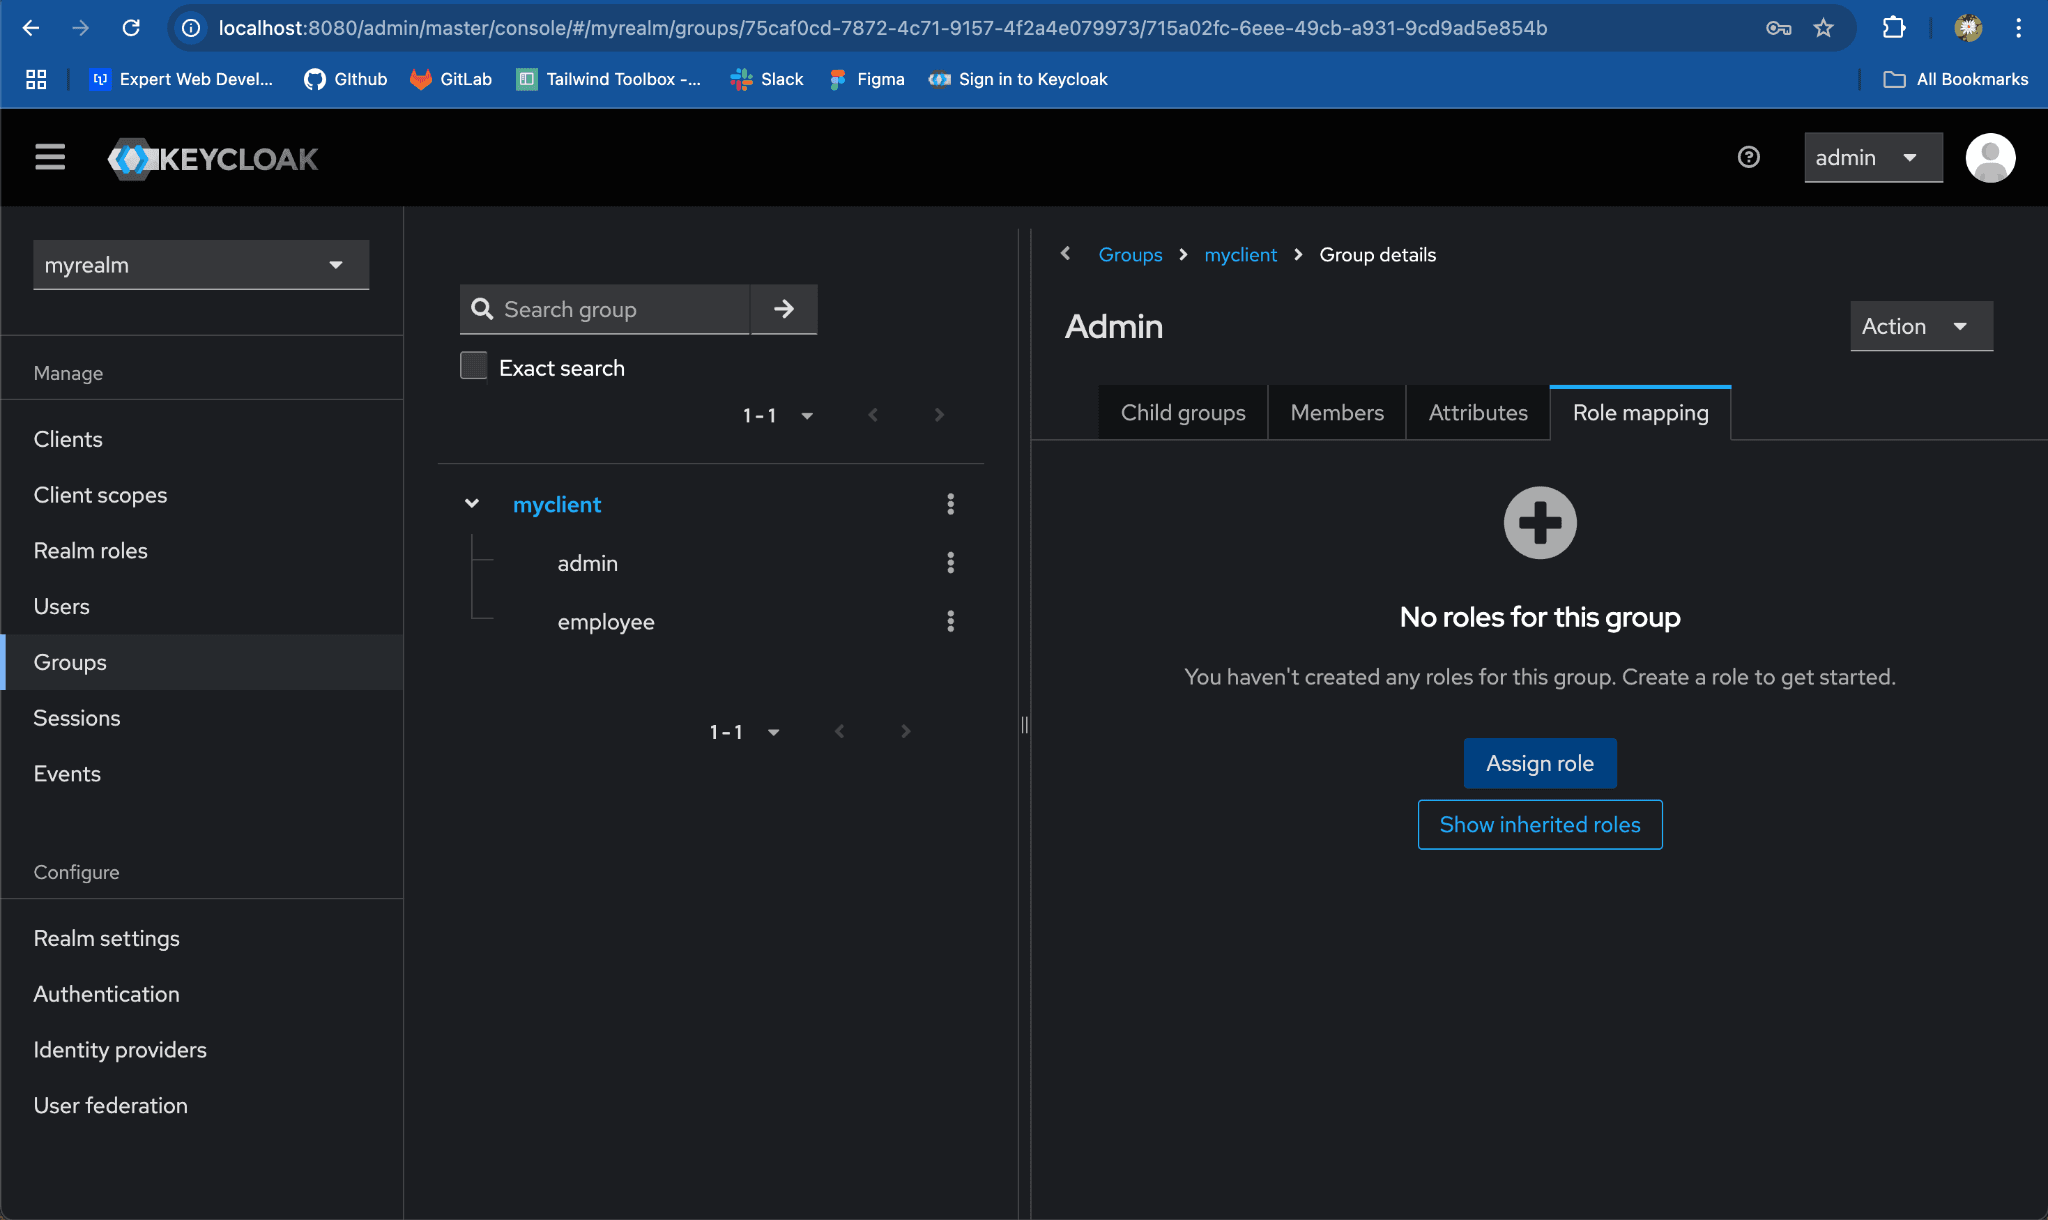
Step 3: Map Client Roles to each Child Group
- Navigate to a Child Group:
- Under
myclientparent group, click onadminchild group
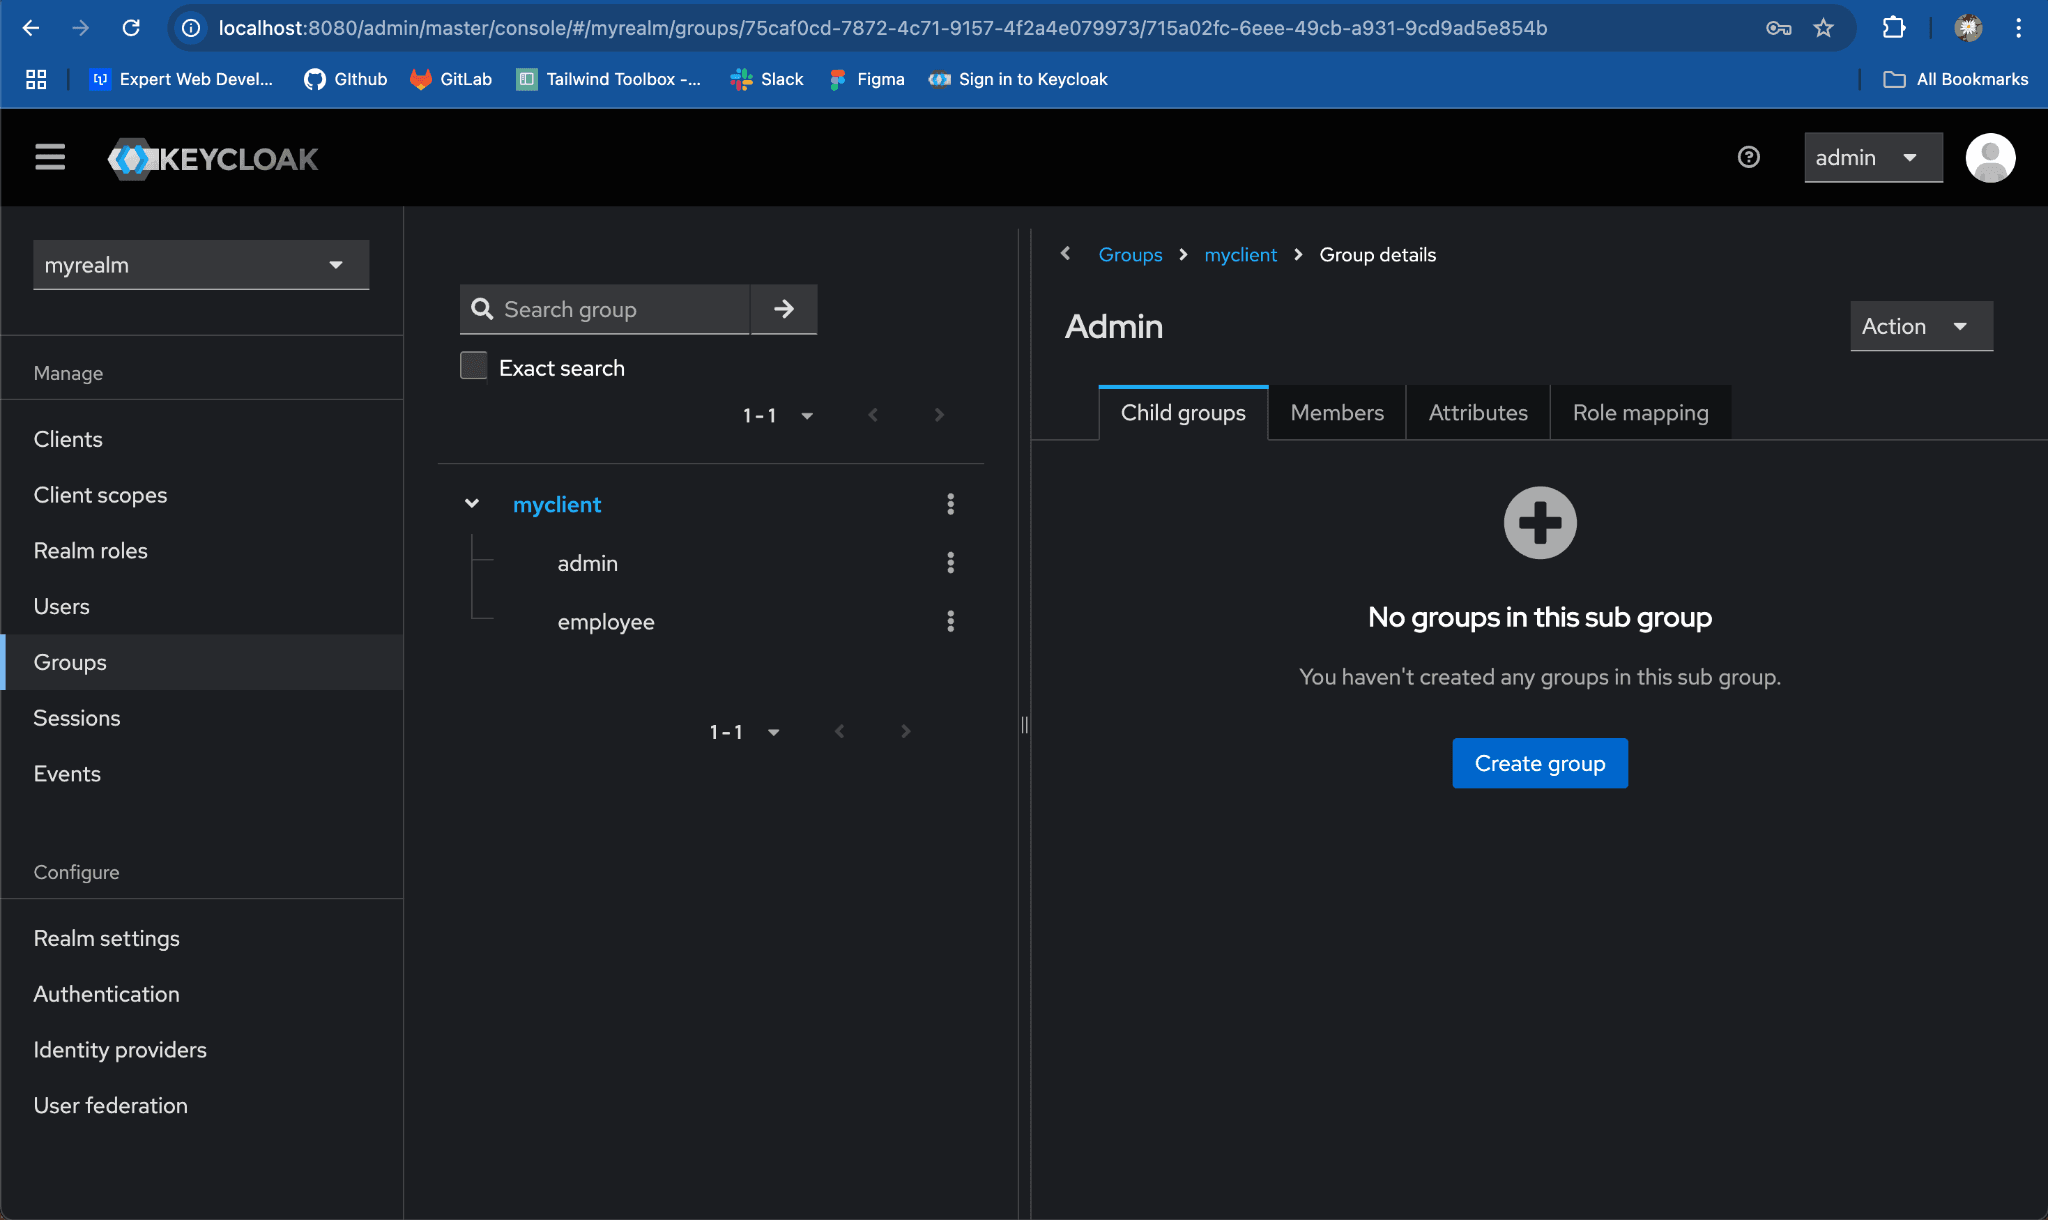
-
Assign Roles to the Child Group:
- Go to the
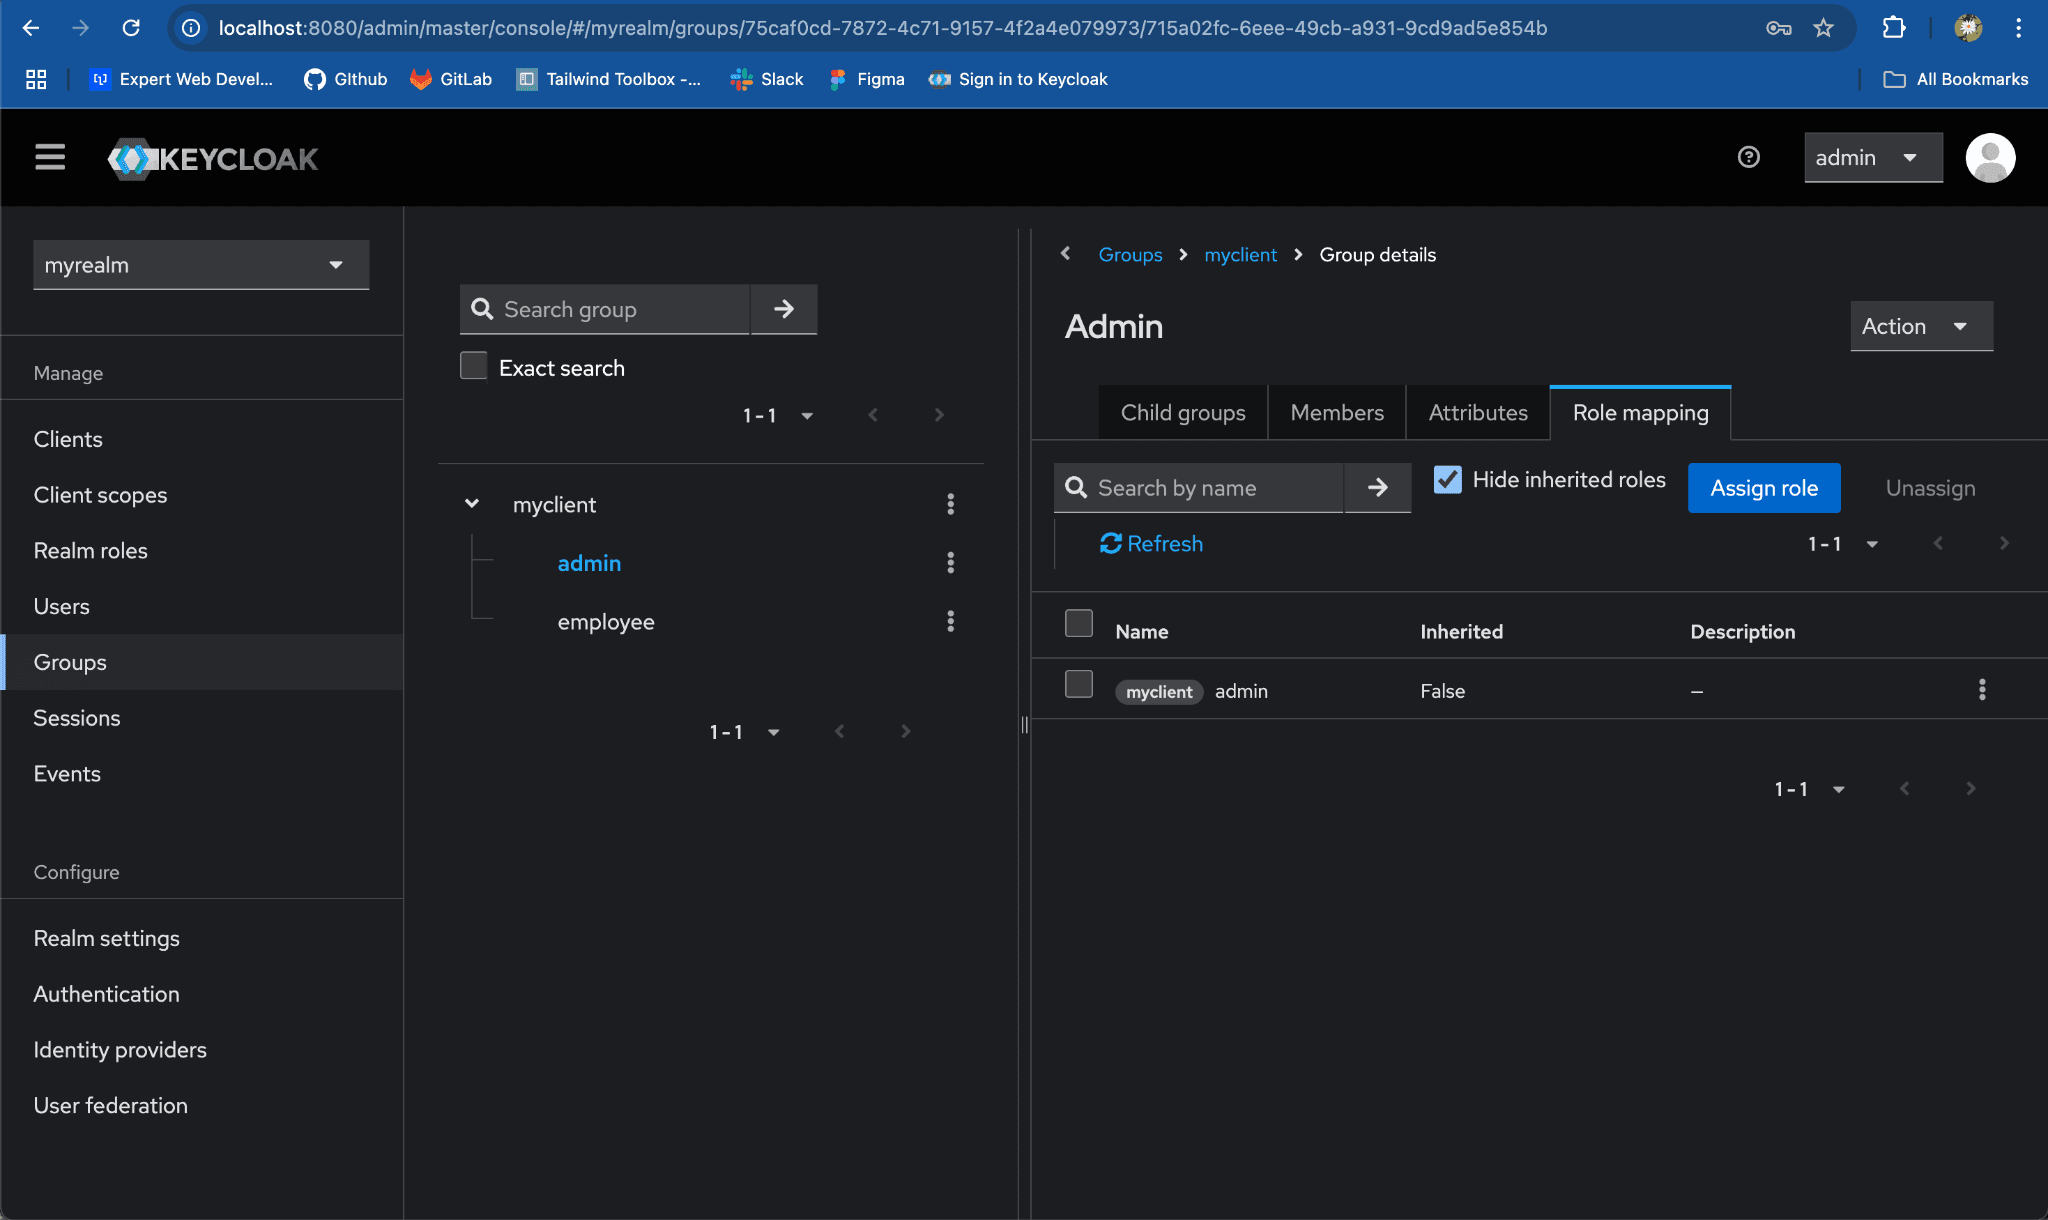
Role mappingstab and click onAssign role.
- Go to the
-
Under the
Assign roles to adminmodal, search foradminrole. -
Assign the
adminrole which belongs tomyclientby selecting the checkbox and click onAssign
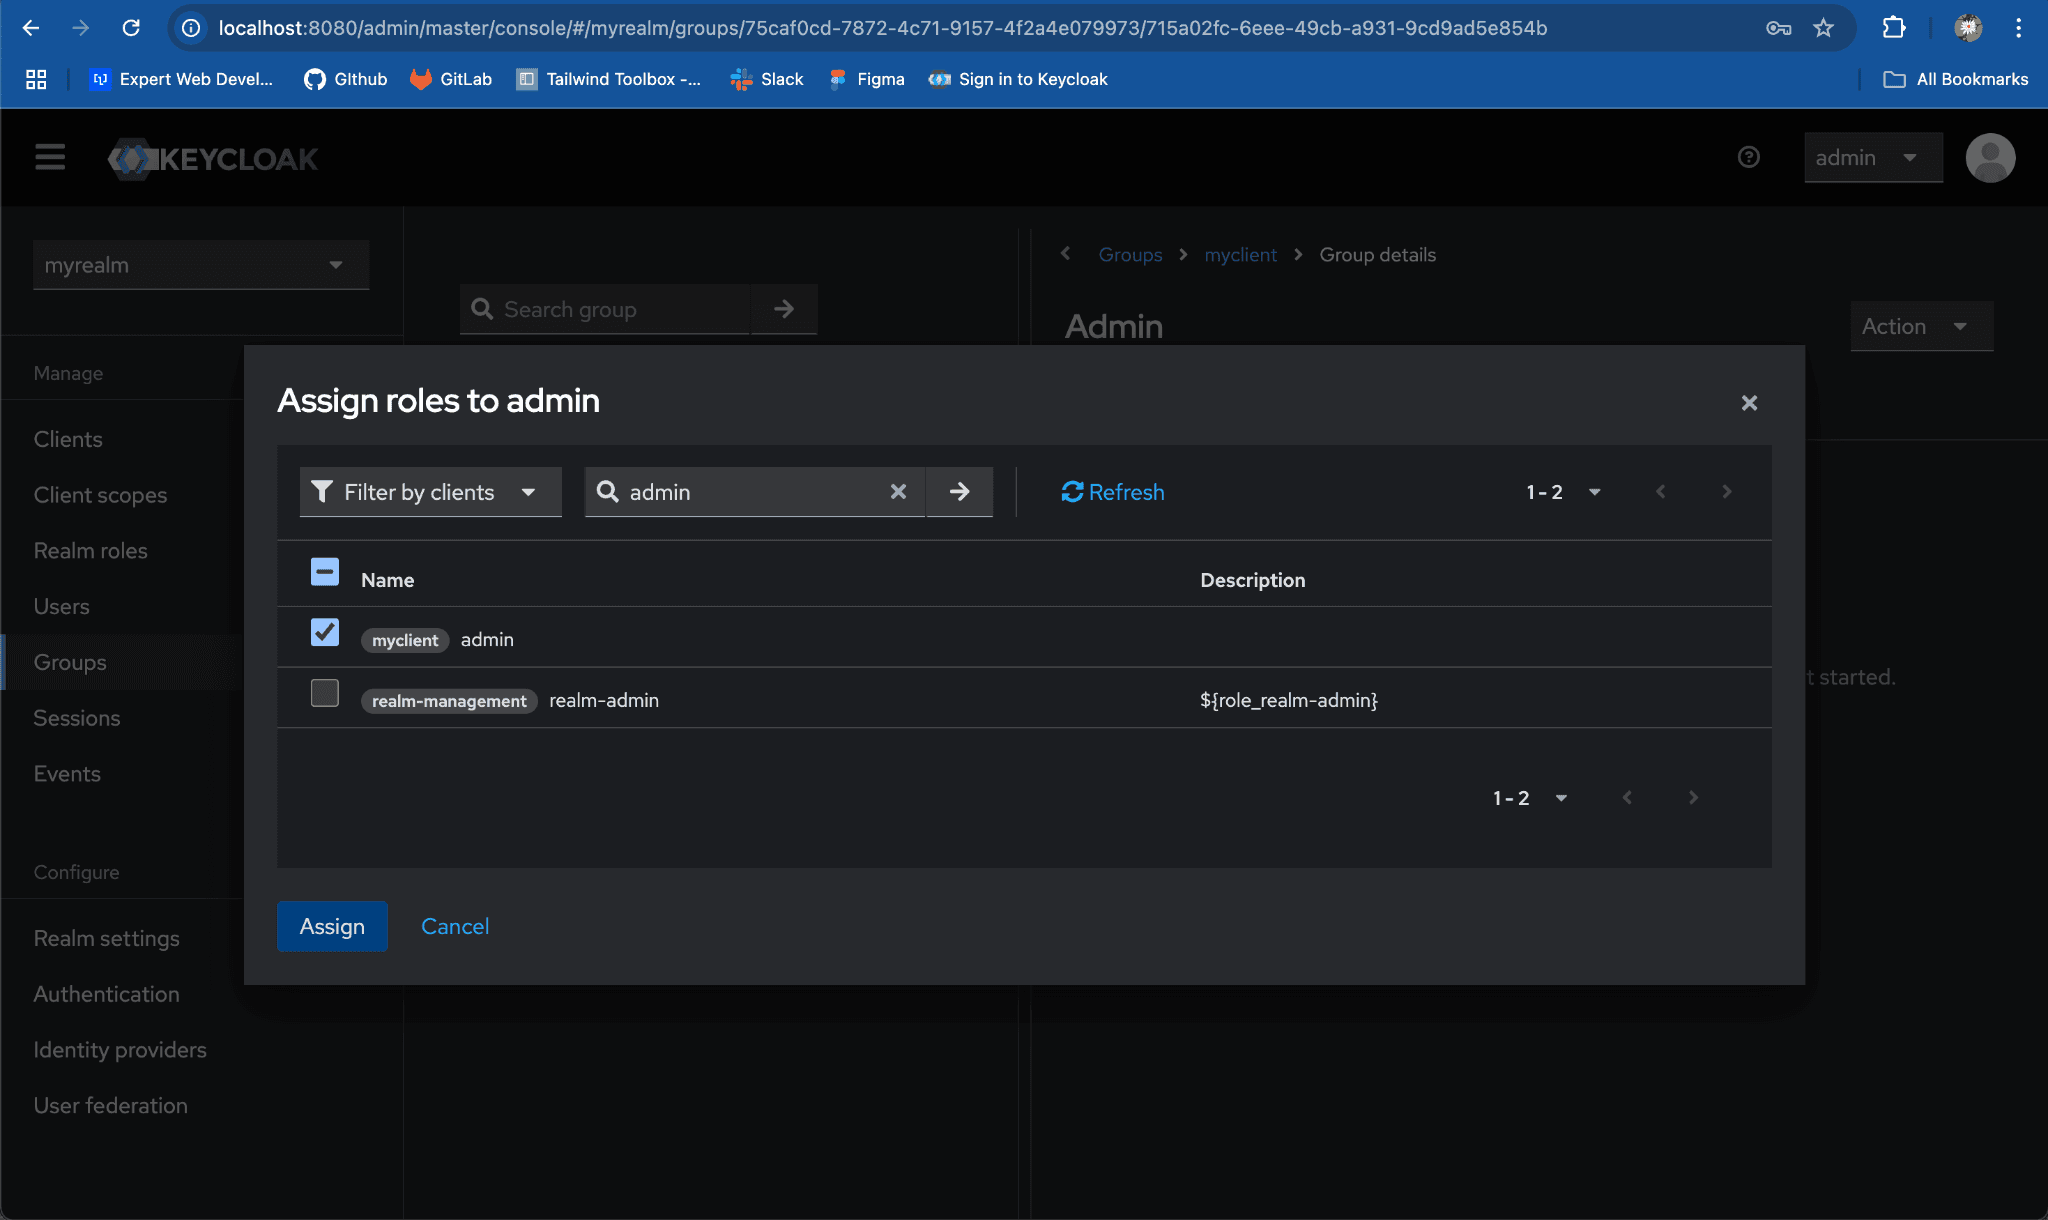
- Repeat for the process
employeegroup, for mappingemployeerole.

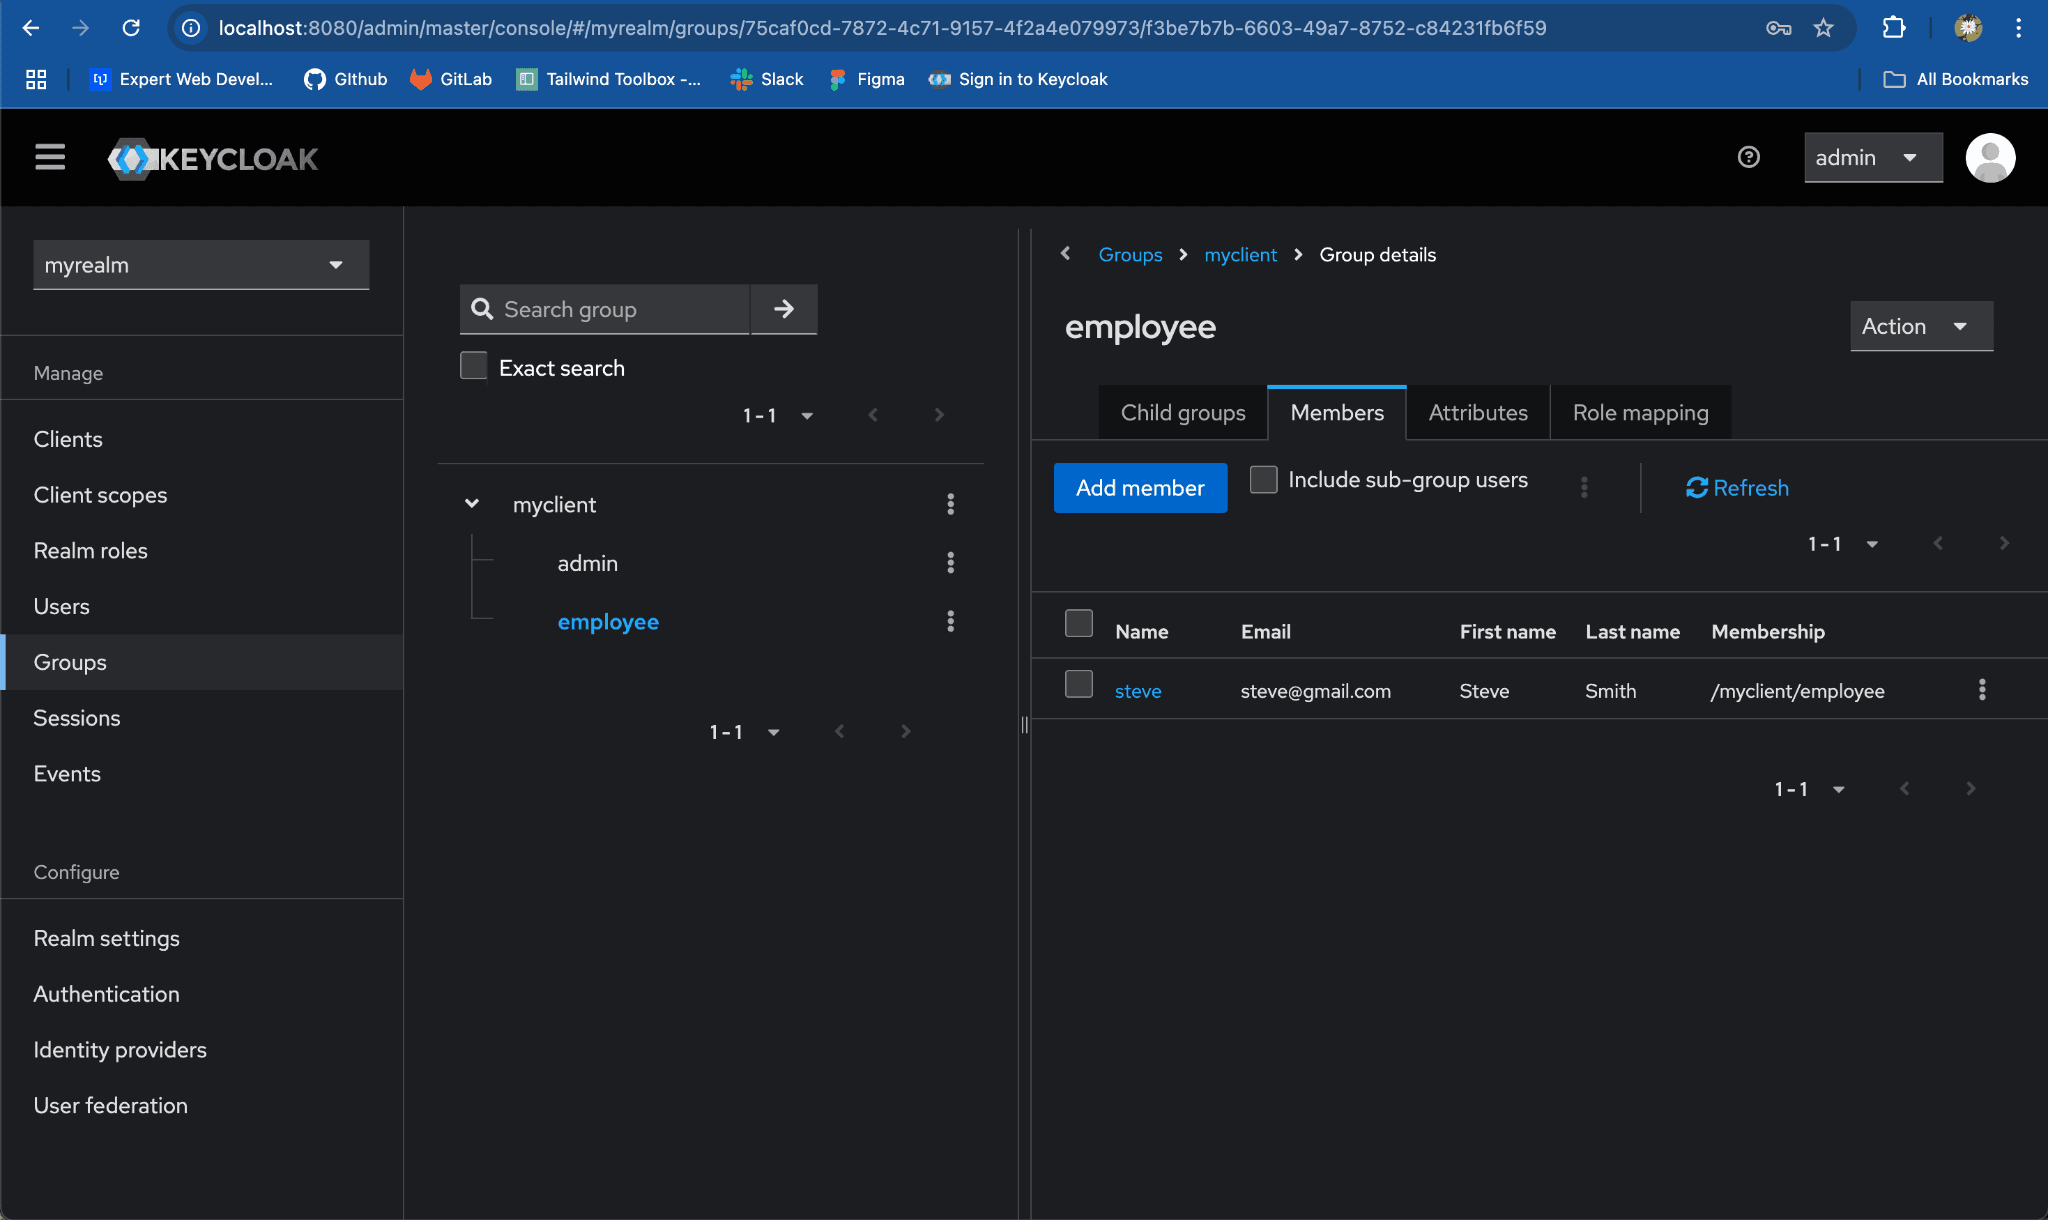
Step 4: Map Users to Each Child Group
- Navigate to admin group:
- Select
Memberstab and click on Add member
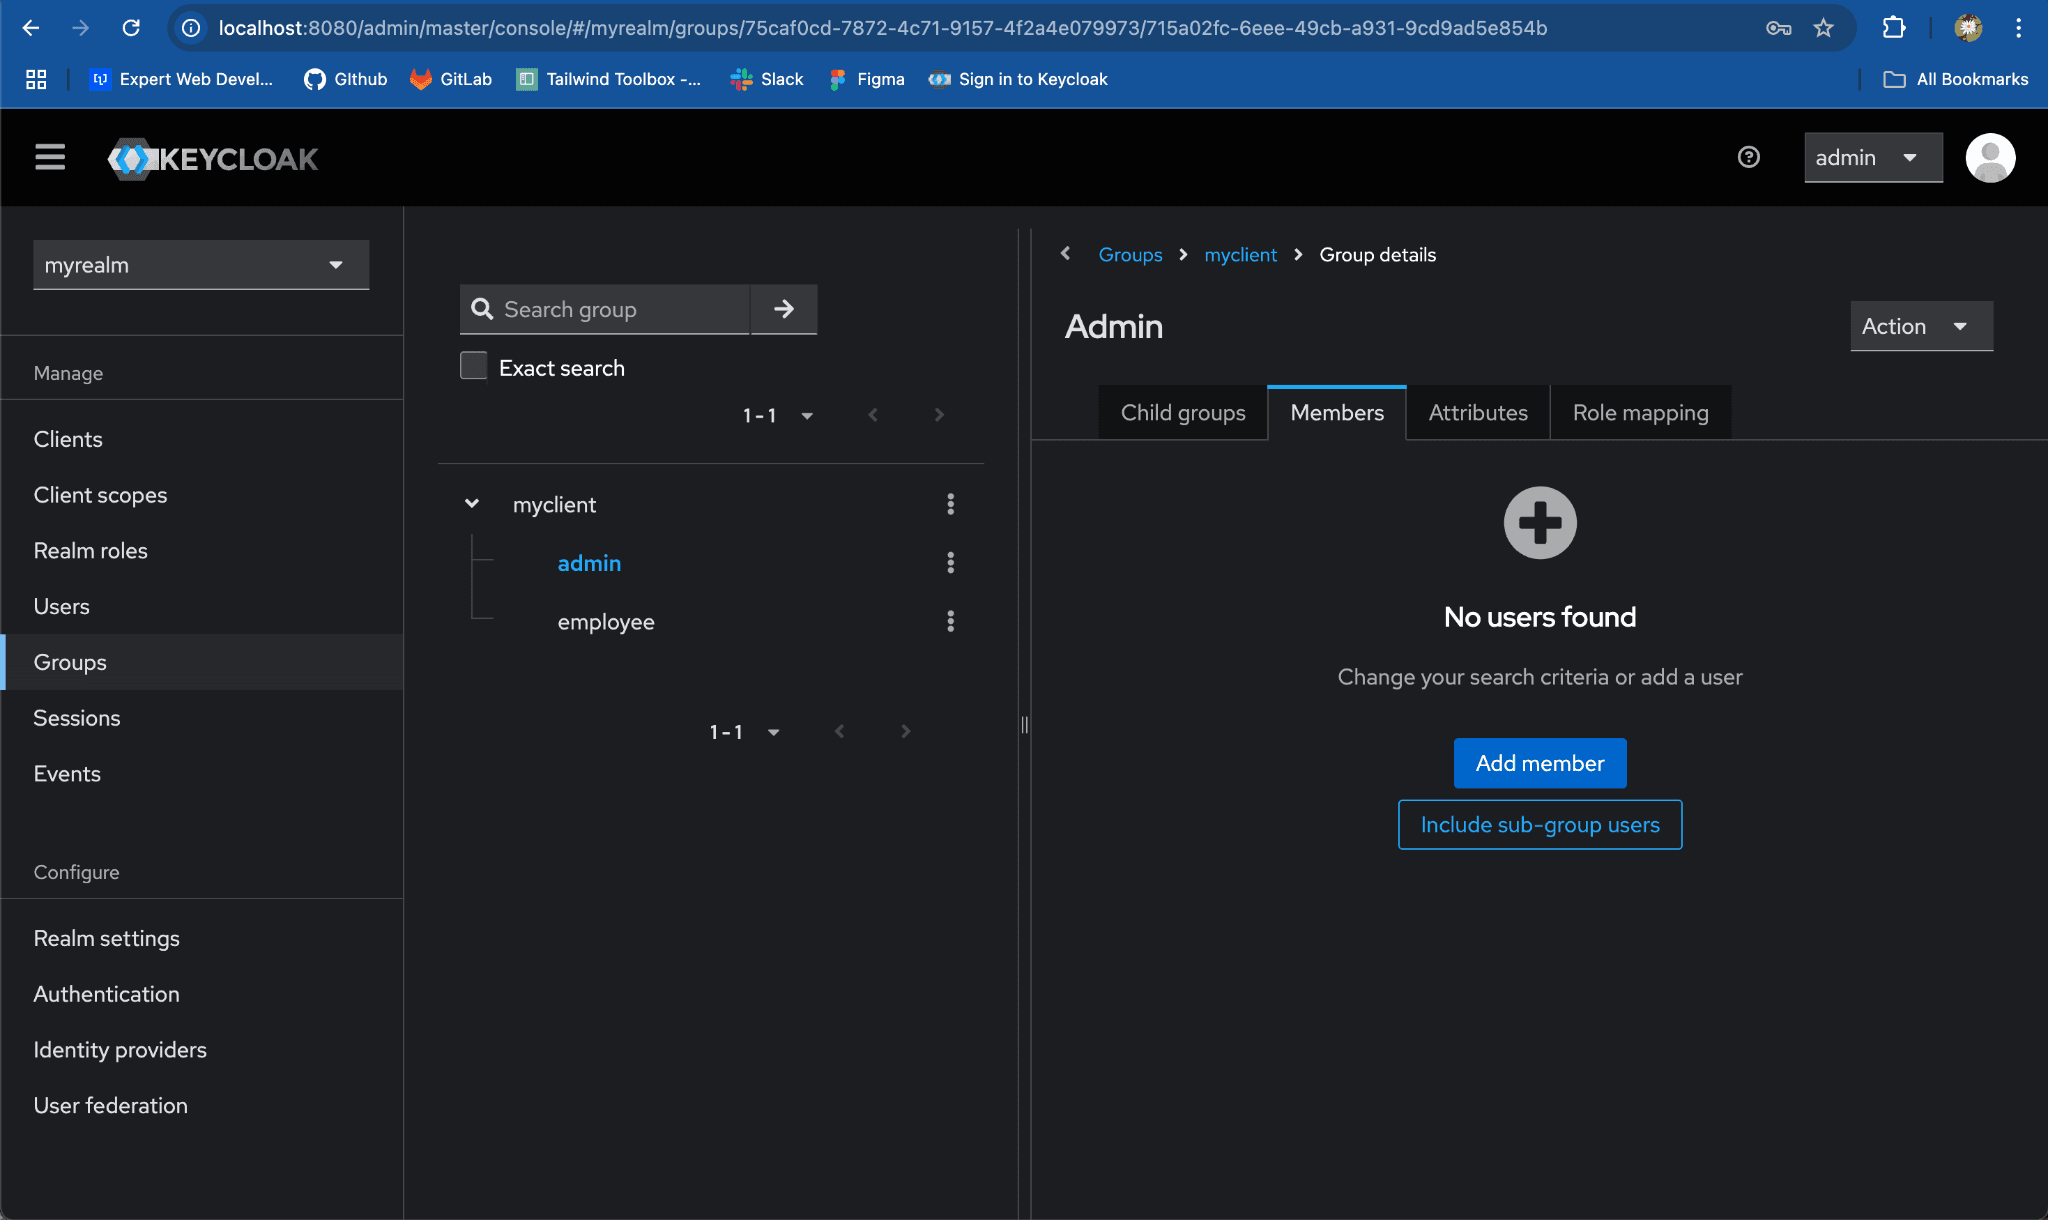
- Select the user you want to add to the admin group and click
Add.
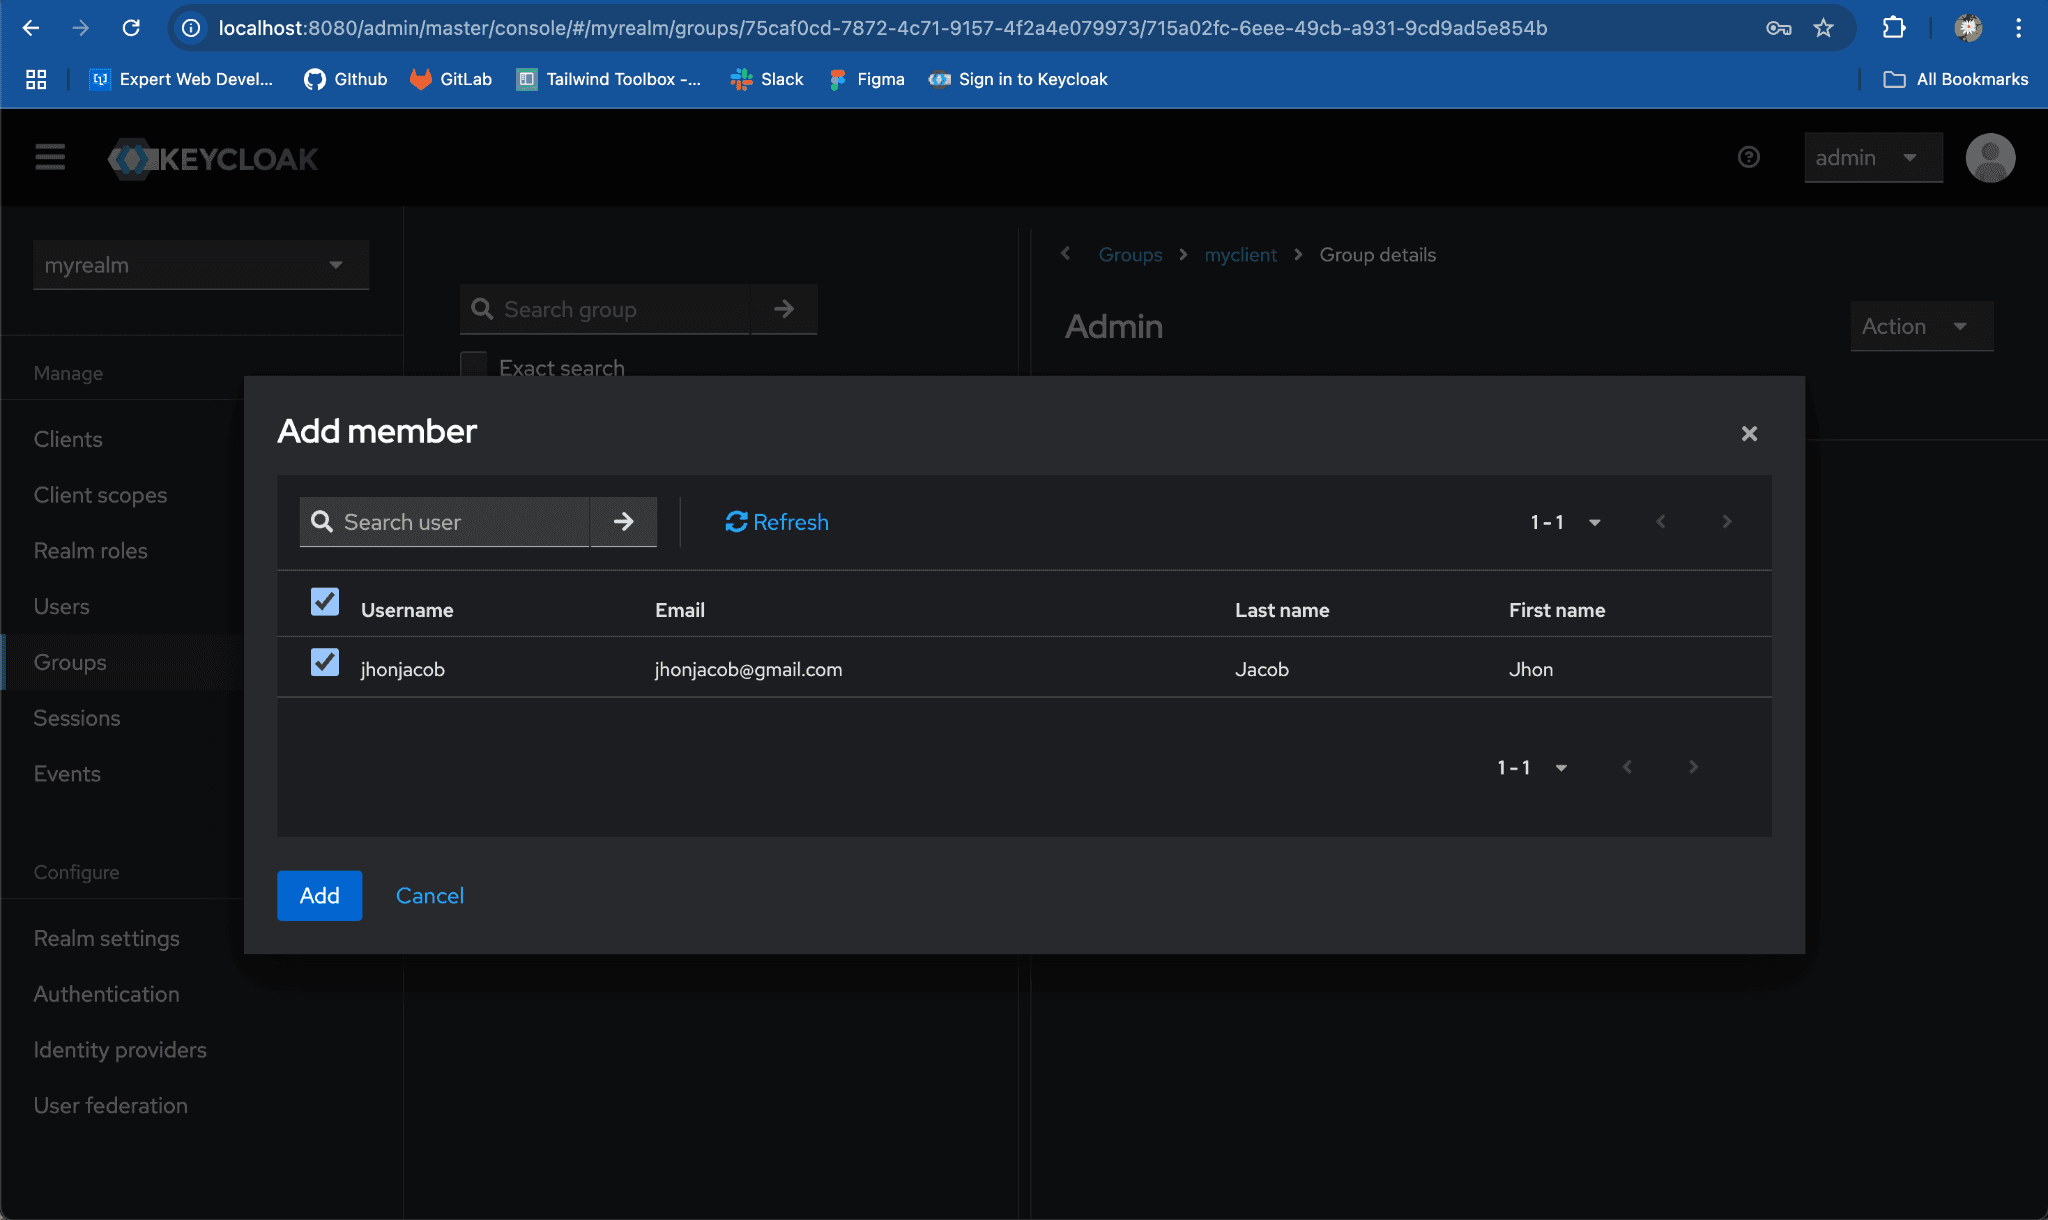
- Navigate to the employee group & repeat the process for another user.
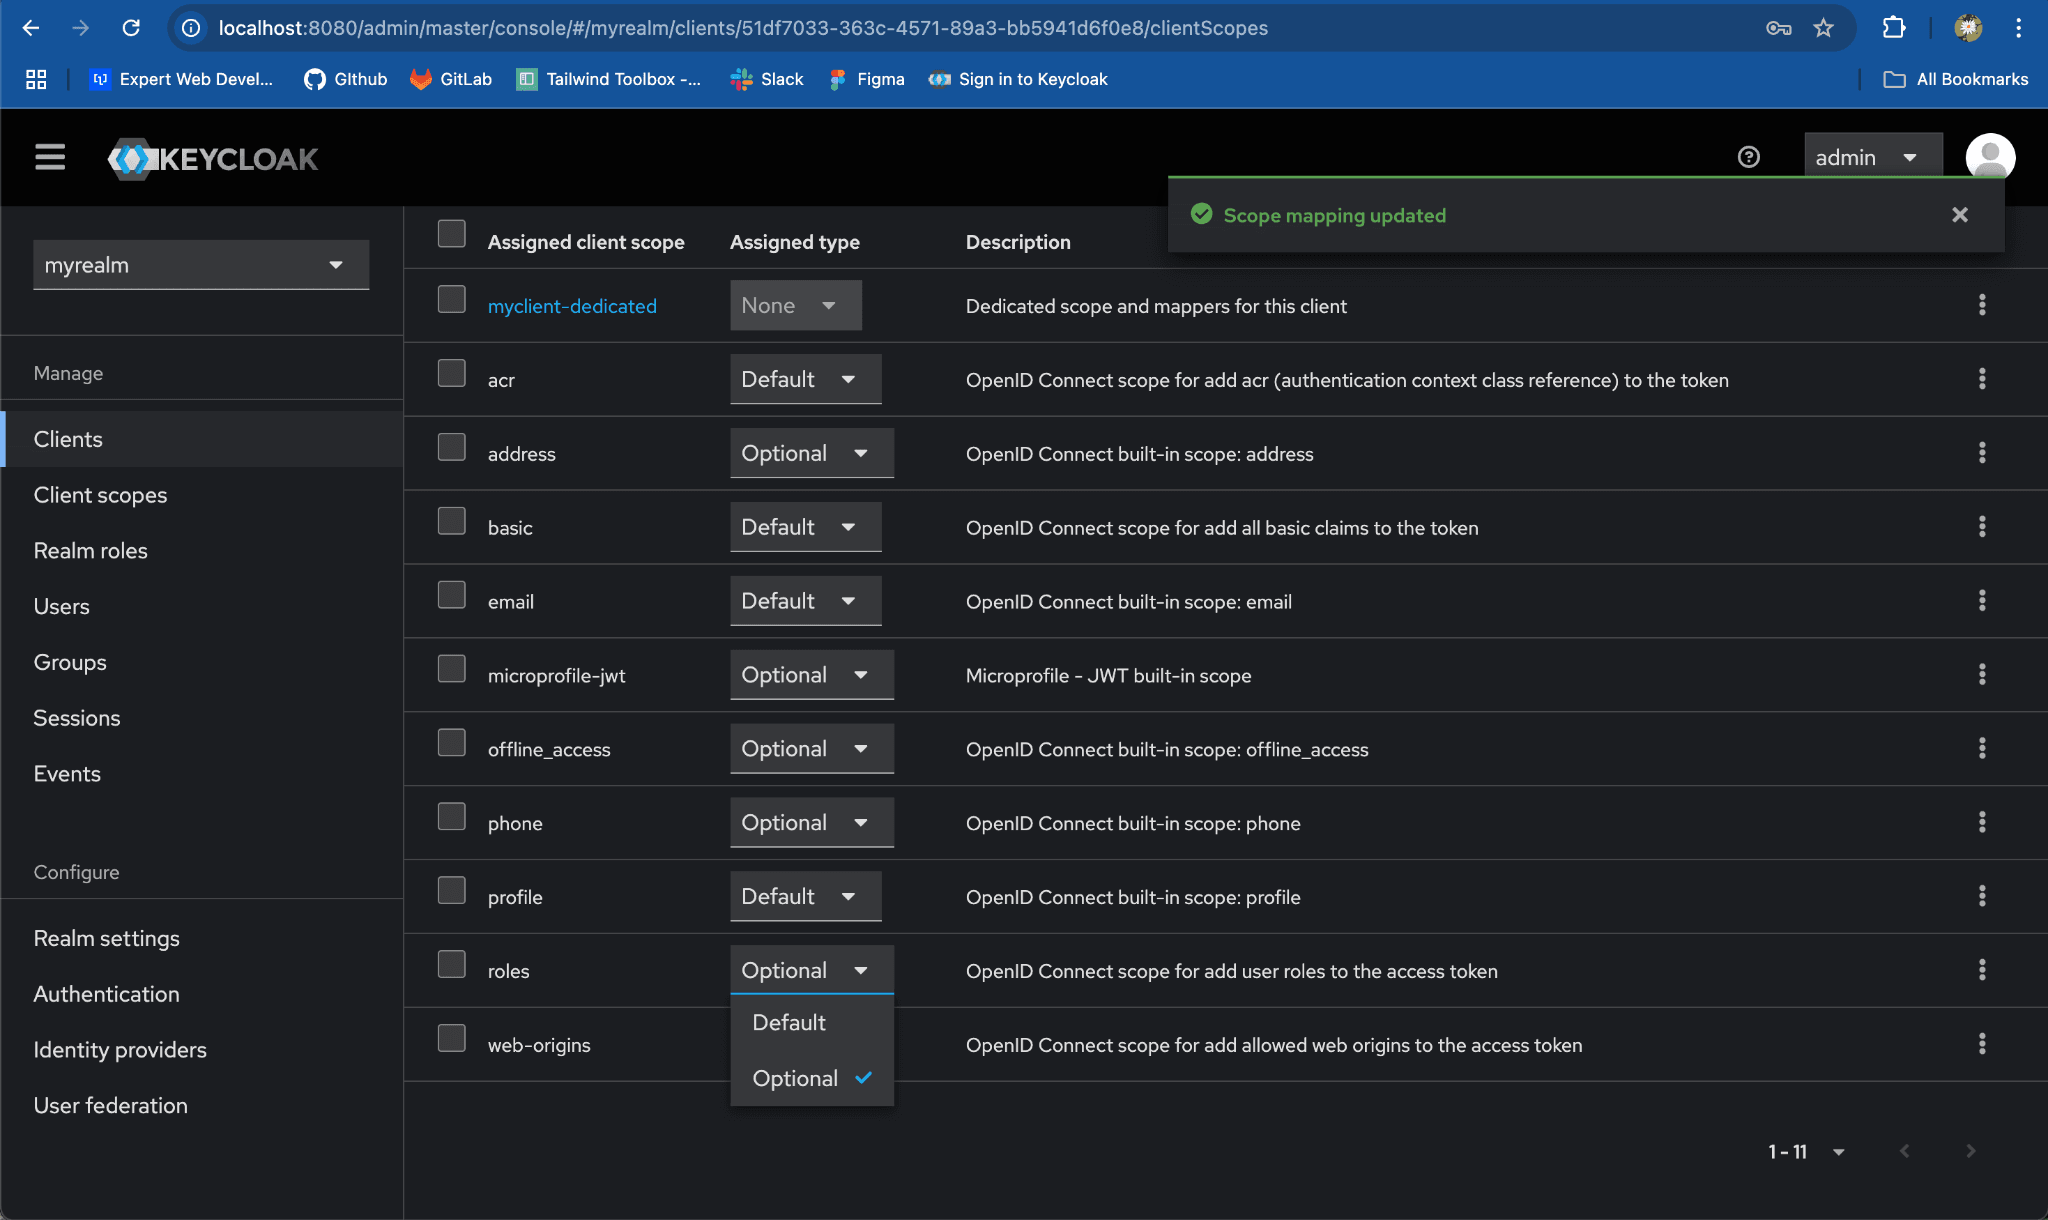
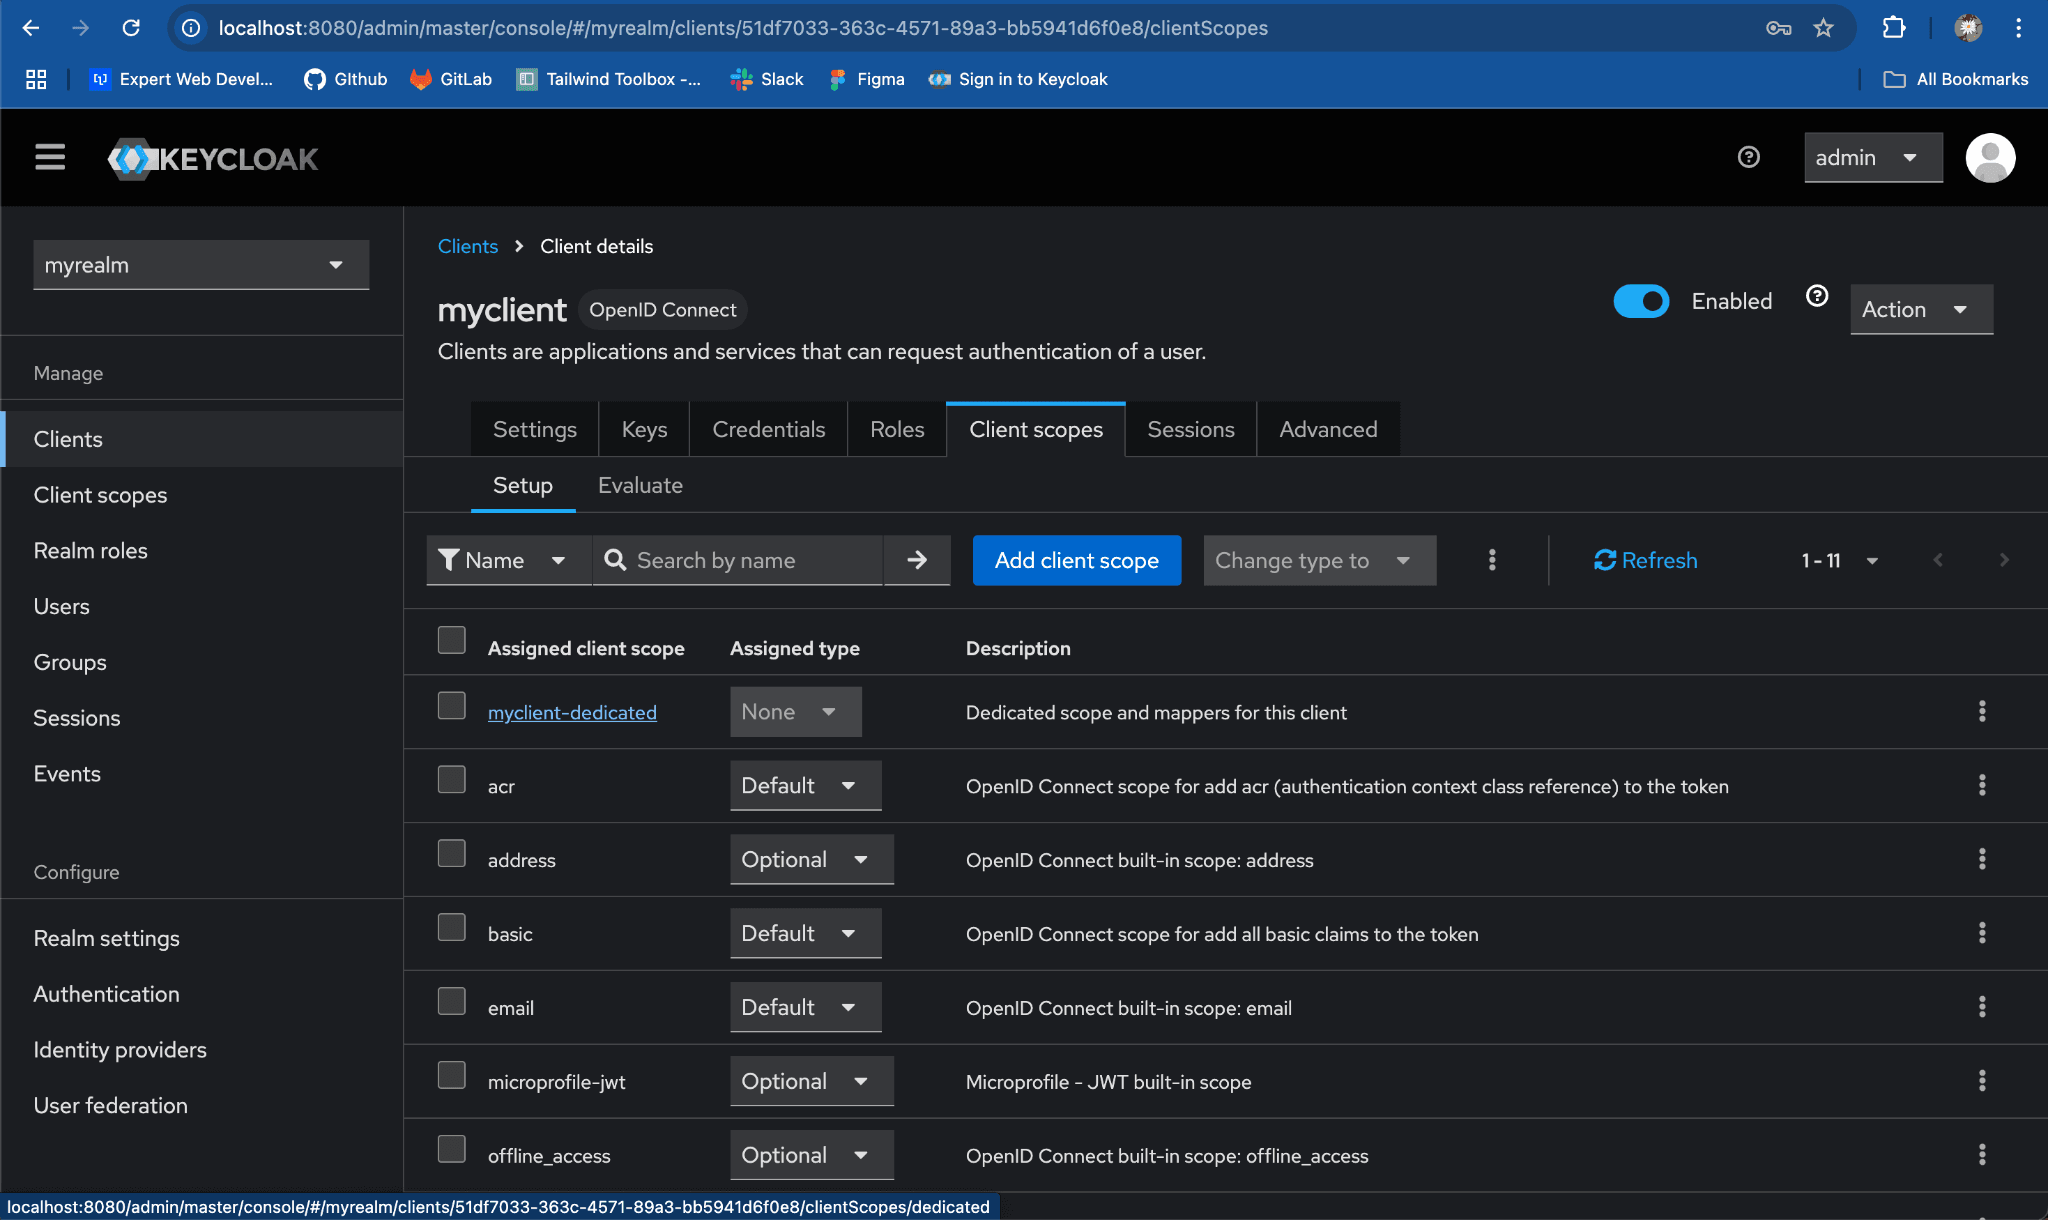
Step 5: Mark Roles as Optional in Client Scopes
- Go to myclient Client:
- Switch to the
Client Scopes.
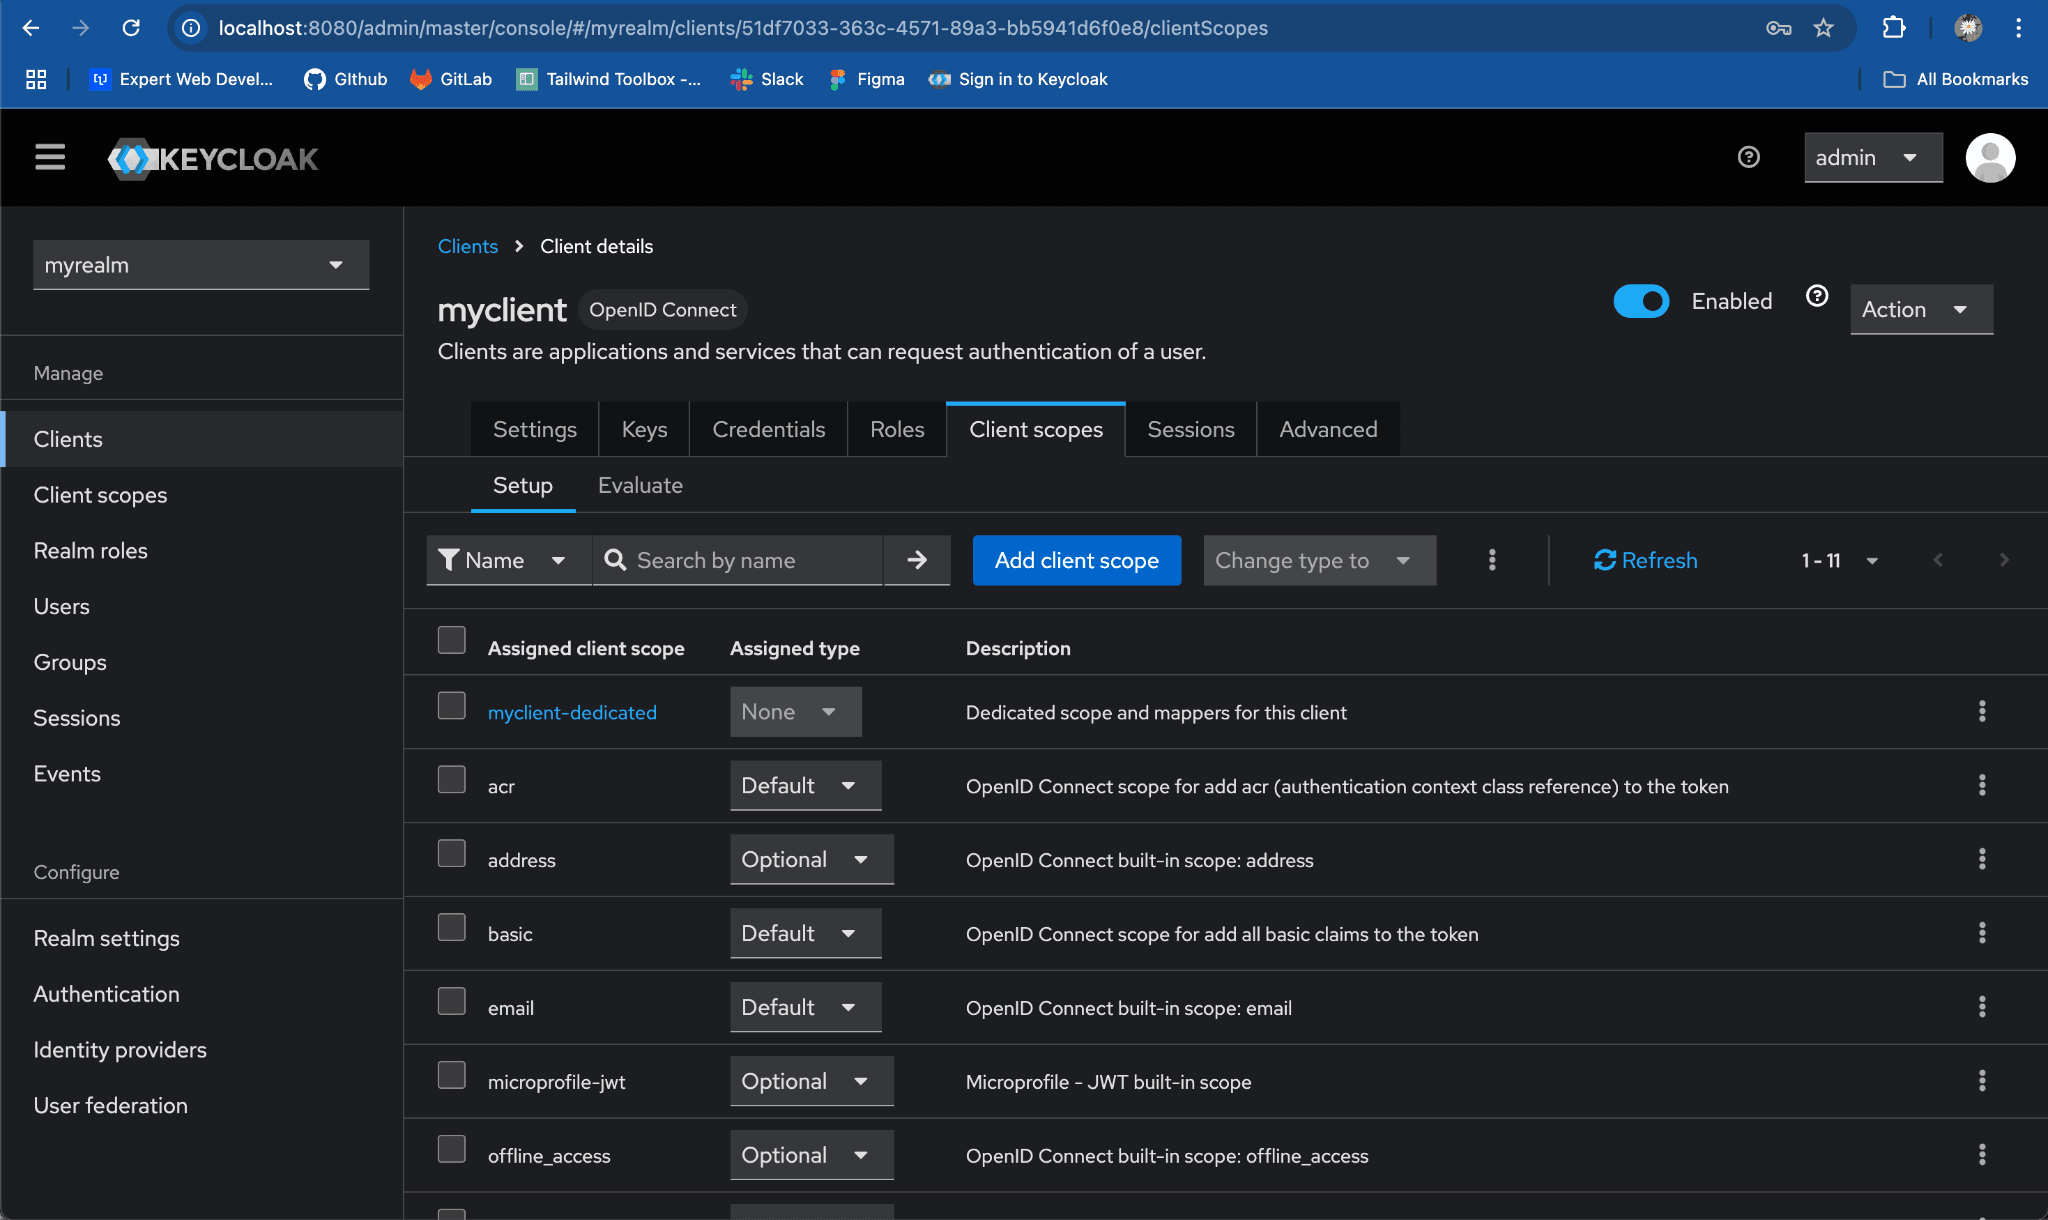
-
Search & locate the
rolesscope underAssigned Client Scopescolumn -
Toggle the Assigned type from
DefaulttoOptional
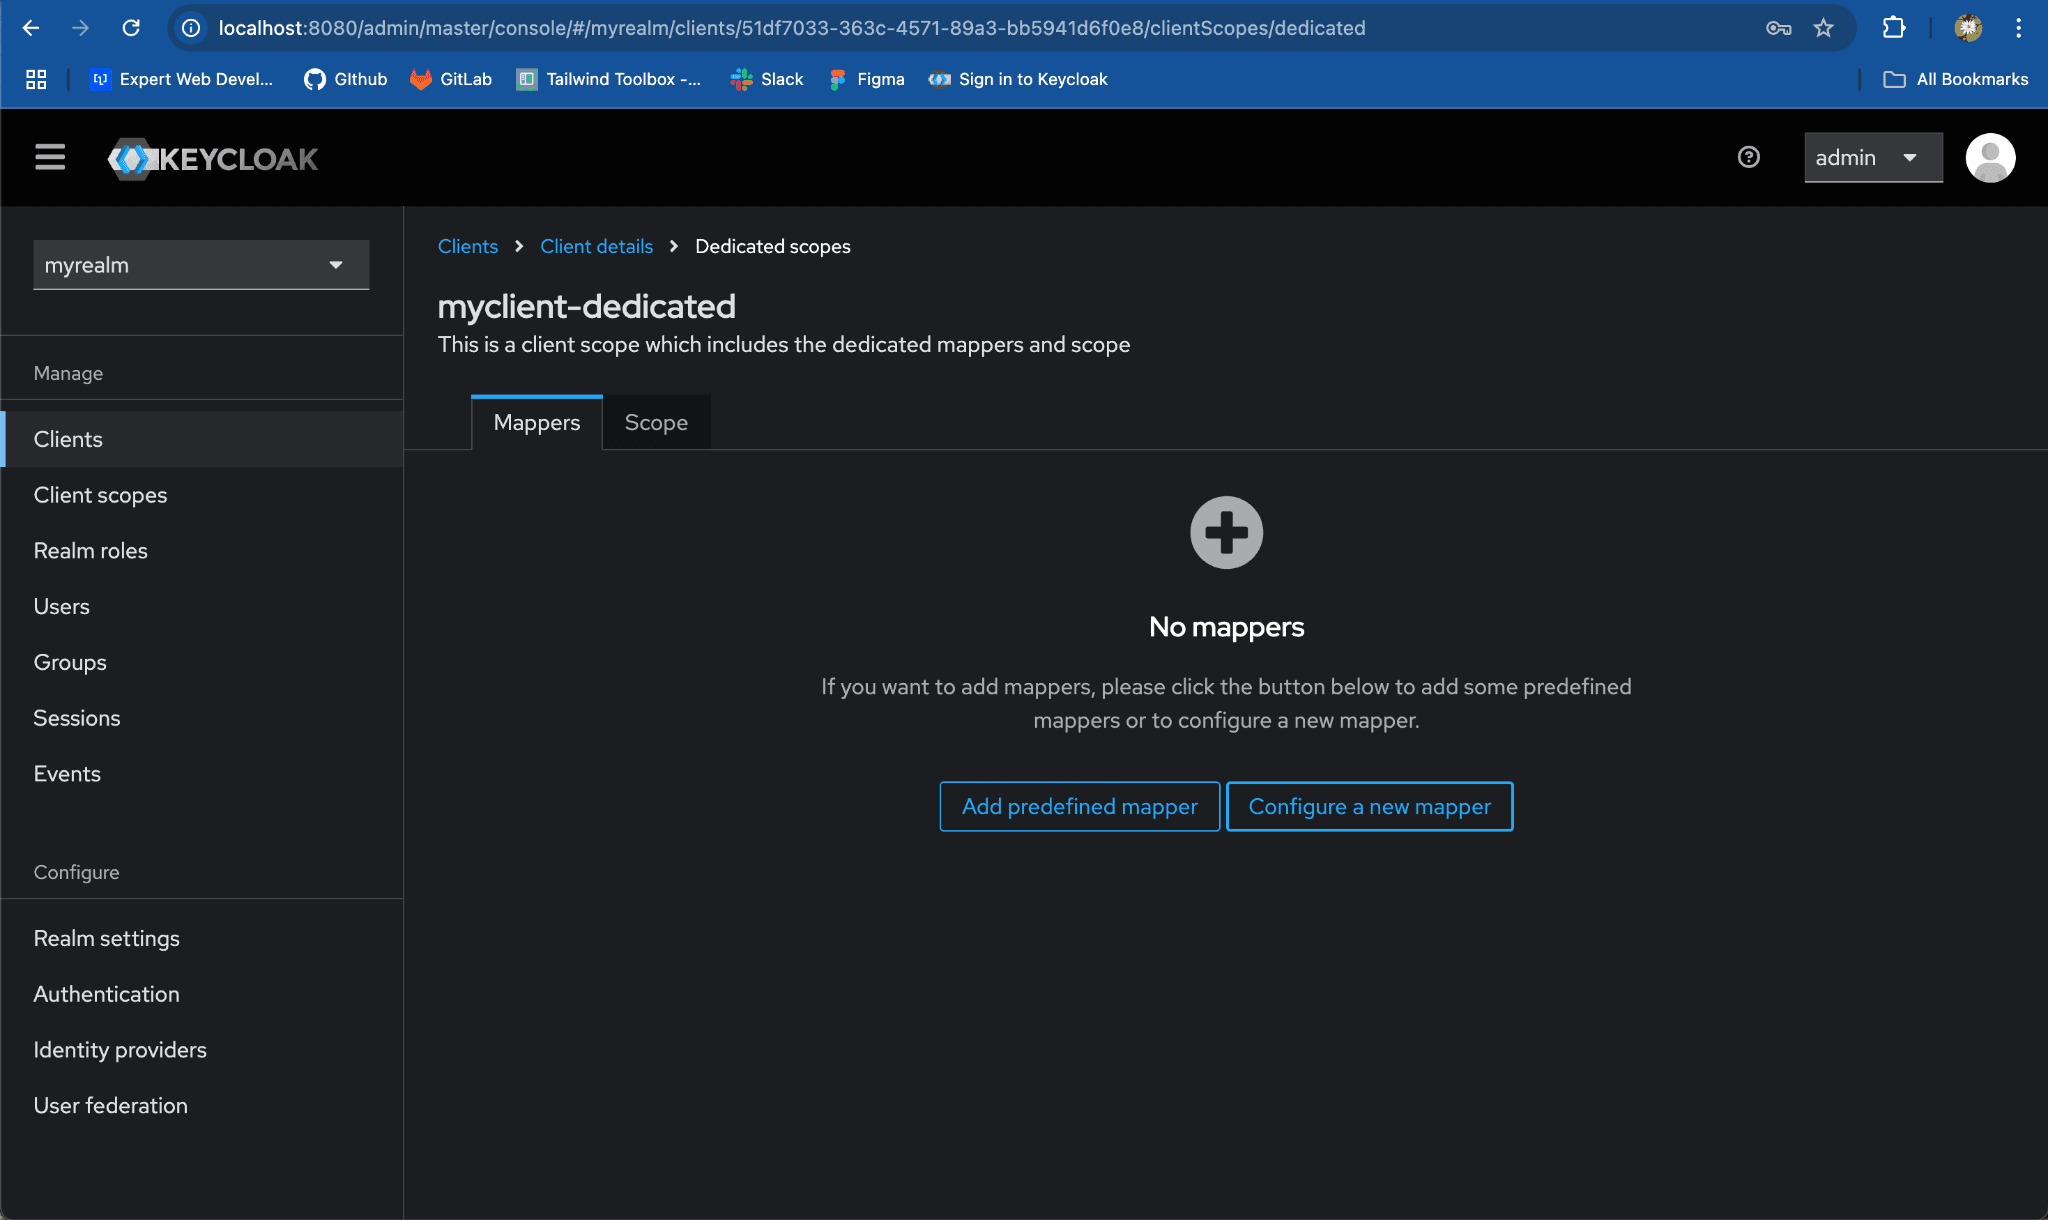
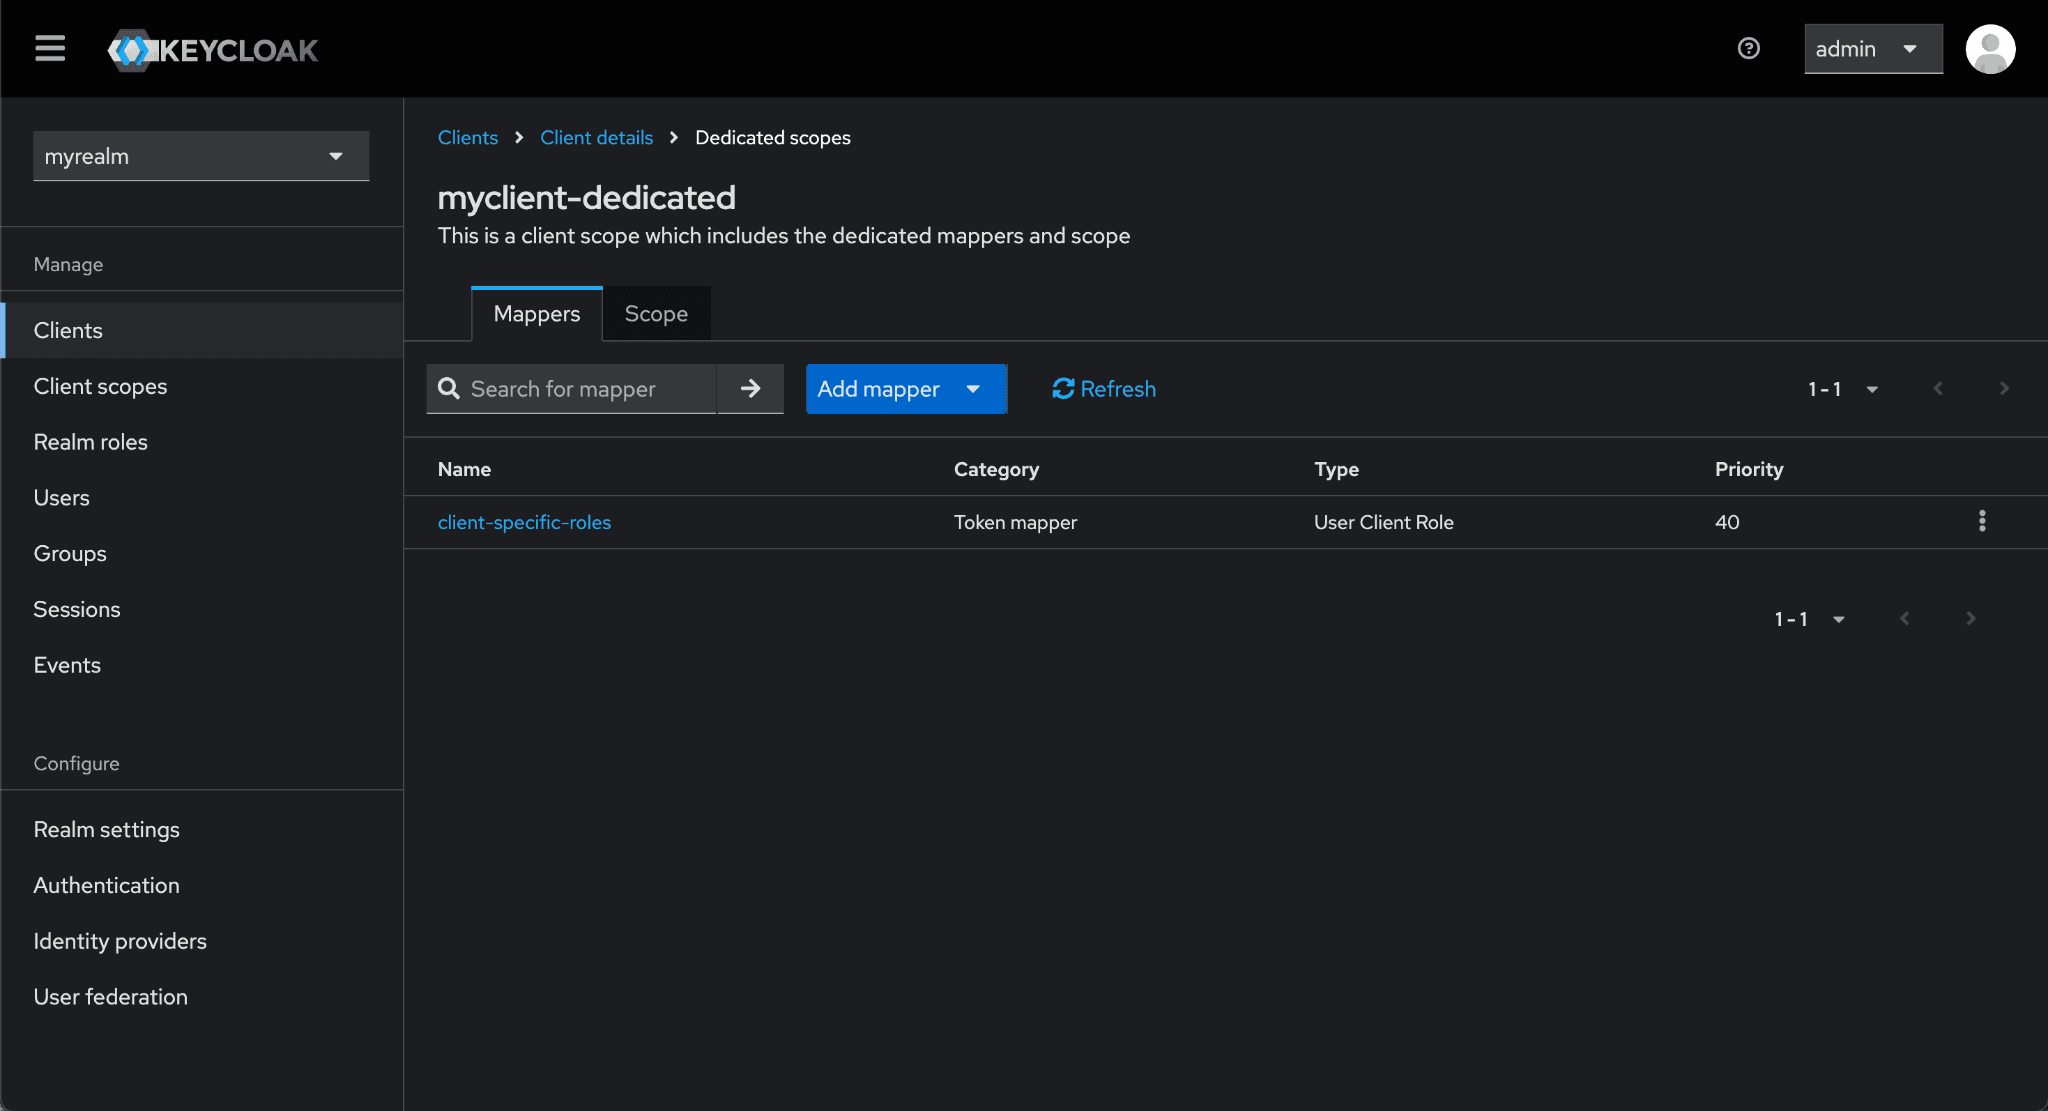
Step 6: Map a User Client Role to a Token Claim
- Go to myclient Client:
-
Switch to the
Client Scopestab. -
Under Assigned client scope column, click on myclient-dedicated.
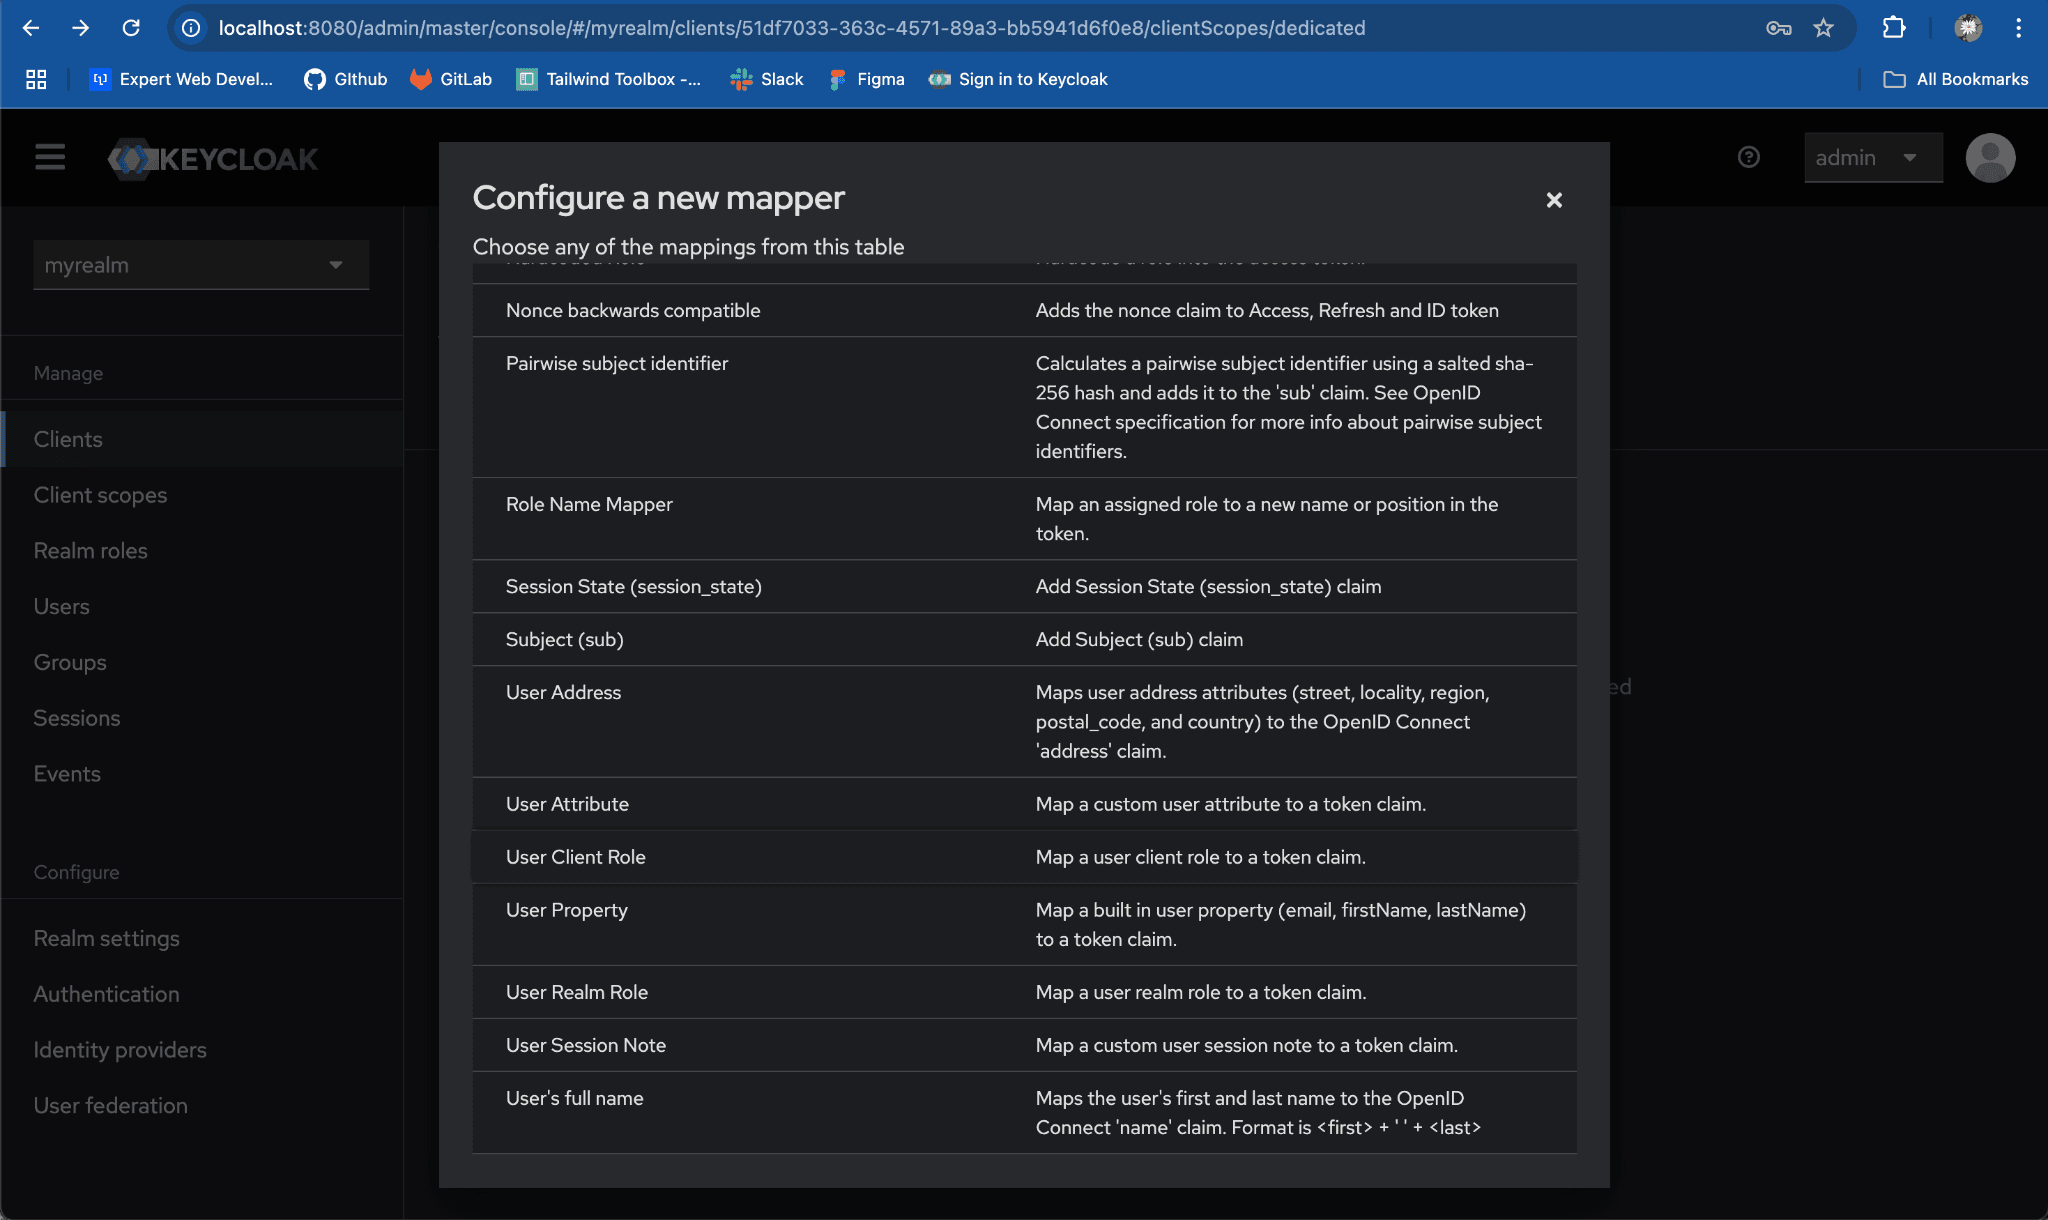
- Configure a new mapper:
- Click on
Configure a new mapperbutton.
- Locate & select
User Client Role.
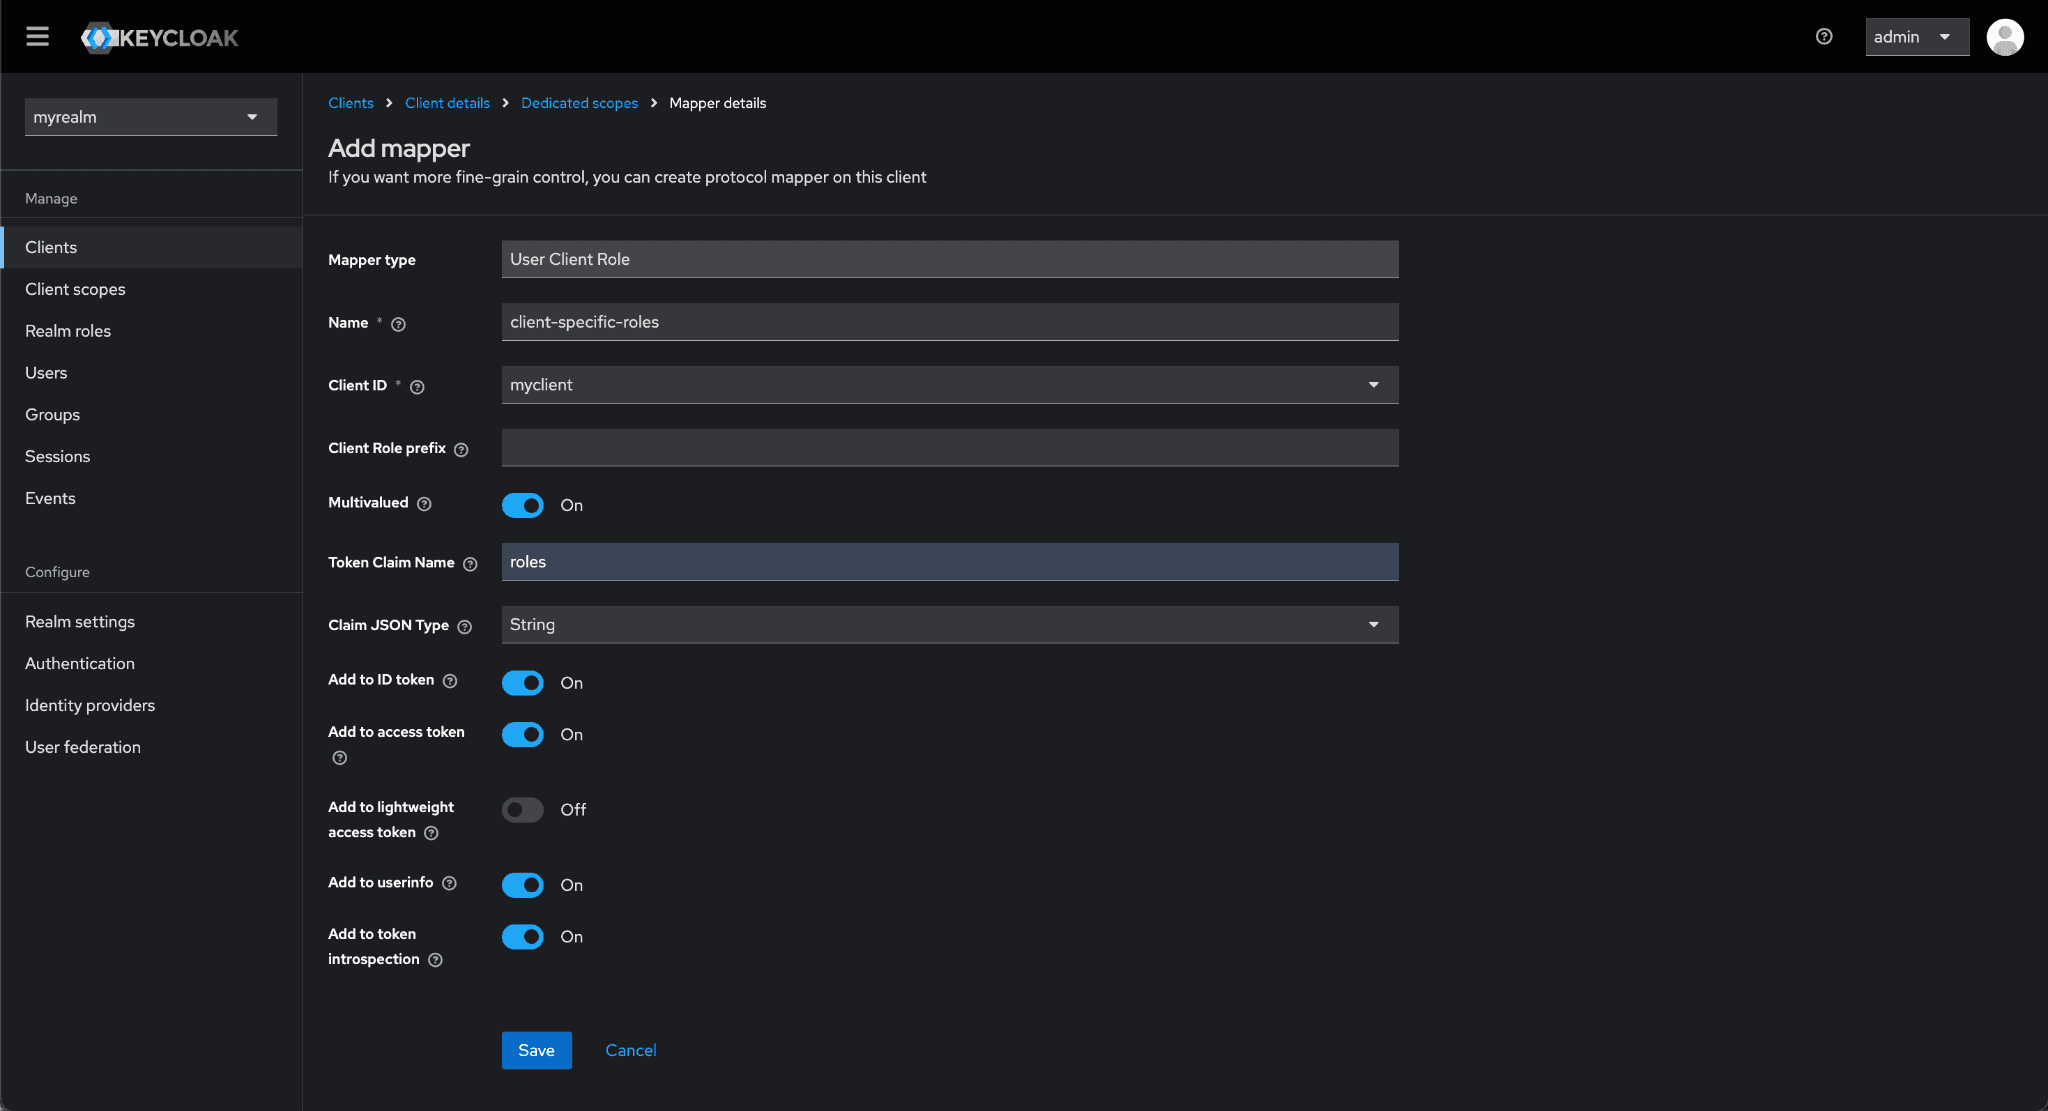
-
Add Name for the mapper e.g. client-specific-roles.
-
Select myclient as Client ID.
-
Add Token Claim Name as roles.
-
Enable Add to ID token, Add to access token, Add to userInfo and click on Save.
Step 7: Access role in your Application:
- Now you can access role of a logged in user from your app/controllers/sessions_controller.rb as
auth['info']['roles']
bash
class SessionsController < ApplicationController
  def create
    auth = request.env['omniauth.auth']
    user = User.find_or_create_by(uid: auth['uid'], provider: auth['provider']) do |u|
      u.name = auth['info']['name']
      u.email = auth['info']['email']
      u.roles = auth['info']['roles']
      u.access_token = auth['credentials']['token']
      u.refresh_token = auth['credentials']['refresh_token']
    end
    session[:user_id] = user.id
    redirect_to root_path, notice: 'Signed in!'
  end

  def destroy
    session[:user_id] = nil
    redirect_to root_path, notice: 'Signed out!'
  end
end
- You can see the key value pair as “roles”=> [“admin”] in the User access token
bash
{"exp"=>1734691386,
 "iat"=>1734691086,
 "auth_time"=>1734691084,
 "jti"=>"cd2a1963-3499-4a6e-8e65-2b903f6ed7f7",
 "iss"=>"https://localhost:3000/realms/KLG",
 "sub"=>"9d4999bd-b7c4-4f31-845e-4dc517fc6dae",
 "typ"=>"Bearer",
 "azp"=>"myclient",
 "sid"=>"51c84b3c-f06d-4f67-99d6-d2284d36352d",
 "acr"=>"1",
 "allowed-origins"=>["http://localhost:3000/*"],
 "scope"=>"email profile",
 "email_verified"=>false,
 "roles"=>["admin"],  <------------- Here
 "name"=>"Jhon Jacob",
 "preferred_username"=>"jhonjacob",
 "given_name"=>"Jhon Jacob"}
Conclusion
By mapping client roles to user groups in Keycloak, you can centralize and simplify access management while maintaining flexibility for role-based permissions. This setup ensures that user roles are clearly defined and easily retrievable in your Rails application, enabling seamless integration with your authentication flow. With this approach, you achieve a robust and scalable solution for managing client-specific roles.
Thank you for following along and happy coding!