Unleash the Power of Hotwire(Part 1)
by Satya Swaroop Mohapatra, Senior System Analyst
As developers, we strive to create web applications that are not only functional but also captivating. We yearn to build
experiences that leave a lasting impression on users and push the boundaries of what's possible. Hotwire in Rails is a game-changer,
offering a powerful toolkit to craft dynamic, responsive applications that redefine user interaction.
Let's embark on this journey together, exploring the potential of Hotwire and unleashing the true power of your Rails development skills!
What is Hotwire?
Hotwire is a set of tools that enable developers to build modern web applications with minimal JavaScript.
It leverages the power of server-rendered HTML, Turbo Frames, Turbo Streams, and Stimulus to create fast, interactive experiences
without the need for complex frontend frameworks.
Key Components of Hotwire:
-
Turbo Drive: Turbo Drive, a feature in Hotwire, supercharges navigation speed in Rails applications. It mimics Single-Page Applications (SPAs) for speed, but without the complex client-side management. When you click a link, Turbo Drive intercepts it, updates the URL, and fetches new content. Similarly, form submissions become fetch requests with Turbo Drive handling redirects and rendering. This selective rendering replaces the body content while preserving the head element and crucial JavaScript objects. The beauty lies in minimal code changes. By following conventions for links and forms, developers unlock SPA-like speed without the complexities, making Turbo Drive a game-changer for building performant Rails applications.
-
Turbo Frames: Imagine a web page divided into sections like a news feed, a chat window, or a shopping cart. Turbo Frames act like individual containers for these sections. Instead of reloading the entire page when content within a specific section needs to change, Turbo Frames allow you to update only that section. This significantly improves performance and user experience by minimizing unnecessary refreshes.
-
Turbo Streams: Take Turbo Frames a step further with Turbo Streams. While Frames handle targeted updates, Streams allow for real-time data updates within those frames. Imagine a live chat application where new messages appear instantly. Turbo Streams achieve this by leveraging WebSockets, a technology that enables a two-way communication channel between the server and the browser.
-
Stimulus: While Turbo Frames and Streams handle content updates, Stimulus focuses on adding interactivity to your web pages. It's a lightweight JavaScript framework that allows you to define custom behaviors for specific HTML elements. Think of it like attaching mini-programs to your HTML elements. For example, you can use Stimulus to create a button that triggers an animation, a form that validates user input, or a dropdown menu that opens and closes on click.
Getting Started with Hotwire in Rails
By default, in Rails 7, Hotwire is included in the application stack. To start using Hotwire in your Rails application, we need to create a new Rails application.
Creating a new rails app
rails new my_hotwire_app --css=tailwind --database=postgresqlWe will be using Tailwind CSS for styling and PostgreSQL as the database for this example. You can choose your preferred CSS framework and database.
Our app will have a model Blog with attributes title, author and content. Let's generate the scaffold for the Blog model.
rails g scaffold Blog title:string author:string content:textThis will create the necessary files for the Blog model, including the controller, views, and migration.
Setting up the database
Run the following commands to create the database and run the migrations:
rails db:prepareNow that we have our db set up, let's go and start our server to see the basic CRUD operations in action.
./bin/devWe have a Procfile.dev file in the root of the project which is used to start the server using foreman. It adds the css watcher which in our case is tailwindcss and also the rails server.
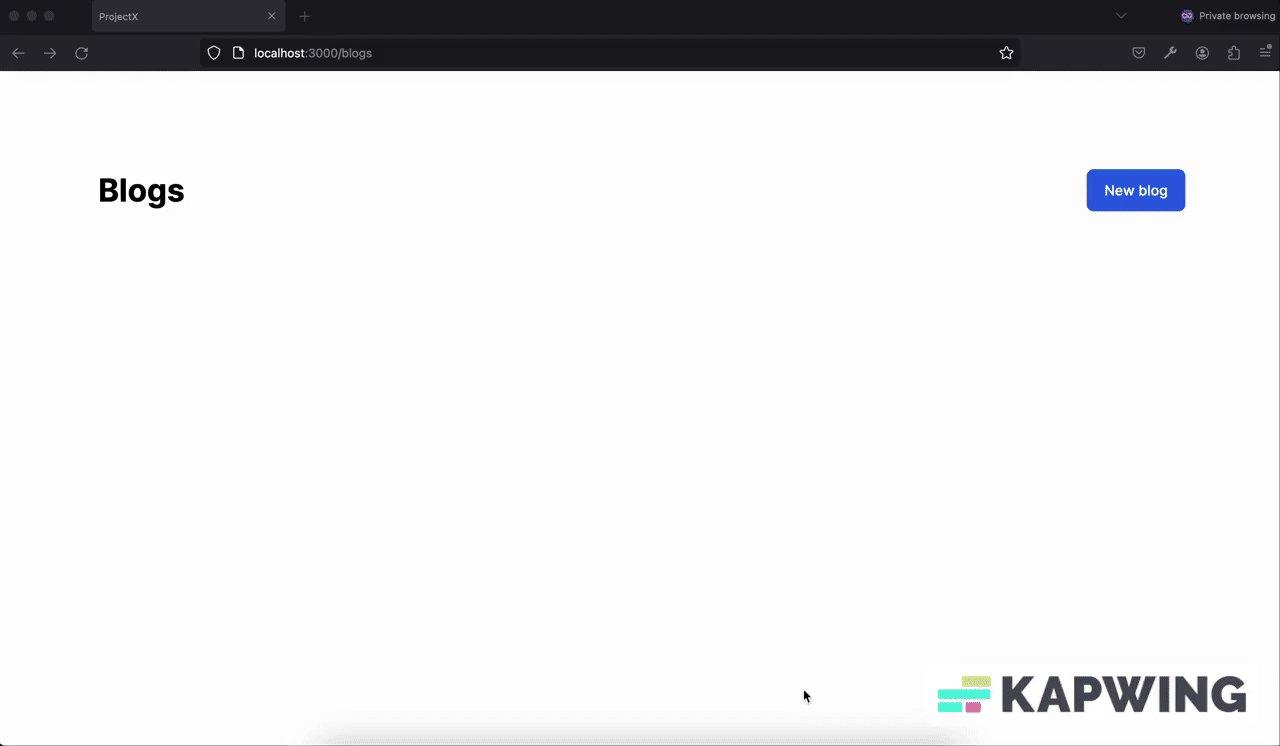
Visit http://localhost:3000/blogs to see the blogs index page. If everything is set up correctly, you should see the below page up and running.

Turbo Drive in action
By default in Rails 7, pages are driven by Turbo Drive. Turbo Drive intercepts link clicks and form submissions, fetching the content via AJAX and replacing the body content without a full page reload. It merges the new content with the existing head content, preserving the state of the page. This results in a faster, more seamless user experience.
Let's observe the network tab with or without Turbo Drive to see the difference.
Scenario 1: With Turbo Drive
- Go to the
Networktab and chooseXHRto filter AJAX requests. You should see the requests made by Turbo Drive. - Click on
Newbutton to redirect to the new blog page. - Observe the network tab to see the request and response.
- Meanwhile also observe the
inspecttab to see the changes in the DOM.

Scenario 2: Without Turbo Drive
- Disable Turbo Drive by going to
app/javascript/controllers/application.jsand adding the following line:
import { Application } from '@hotwired/stimulus';

const application = Application.start();

// Configure Stimulus development experience
application.debug = false;
window.Stimulus = application;

// Manually disable Turbo Drive
Turbo.session.drive = false;

export { application };- Restart the server and go to the
Networktab to see the requests made without Turbo Drive. - Click on
Newbutton to redirect to the new blog page. - Observe the network tab to see the request and response.
- Meanwhile also observe the
inspecttab to see the changes in the DOM.
So you can see the difference between the requests made with and without Turbo Drive. Turbo Drive makes the navigation faster and seamless by fetching the content via AJAX request and replacing the body content without a full page reload whereas without Turbo Drive, the page reloads completely.
Turbo Frames in action (Create)
Before implementing Turbo Frames, let's perform the basic create operation without Turbo Frames.
- Go to the
Blogsindex page. - Click on the
New Blogbutton. - Fill in the details and click on
Create Blog. - You will be redirected to the blog detail page i.e
showpage. - Click on the
Back to blogsbutton to go back to theBlogsindex page, and you will see the newly created blog in the list.
So much back and forth right? Let's enhance this experience using Turbo frames!
Our requirement is to make the index page of the blogs load the new blog form in the blogs page itself without redirecting to a new page.
Step 1: Adding Turbo frame in the index Page
Open the app/views/blogs/index.html.erb file and replace the existing content with the following code:
<div class="w-full">
  <% if notice.present? %>
    <p class="py-2 px-3 bg-green-50 mb-5 text-green-500 font-medium rounded-lg inline-block" id="notice"><%= notice %></p>
  <% end %>
  <%= turbo_frame_tag "create-blog" do %>
    <div class="flex justify-between items-center">
      <h1 class="font-bold text-4xl">Blogs</h1>
      <%= link_to "New blog", new_blog_path, class: "rounded-lg py-3 px-5 bg-blue-600 text-white block font-medium" %>
    </div>
  <%end%>
  <div id="blogs" class="min-w-full">
    <%= render @blogs %>
  </div>
</div>
In the above code, we have wrapped the content of the index page using turbo_frame_tag helper function with an unique id create-blog. So when we click on the New blog button, the new blog form will be loaded inside the create-blog frame without redirecting to the new blog page.
Let's go to the browser and click on the New blog button and let's see what happens.

What happened? The content is missing, right? :)
This is because turbo_frame_tag expects a same frame with an id create-blog in the blogs new page as well. So when we click on the New blog button, the content inside the create-blog frame is replaced with the content of the new blogs page.
Let's add the turbo_frame_tag to the new blog form page.
Step 2: Adding Turbo frame in the new page
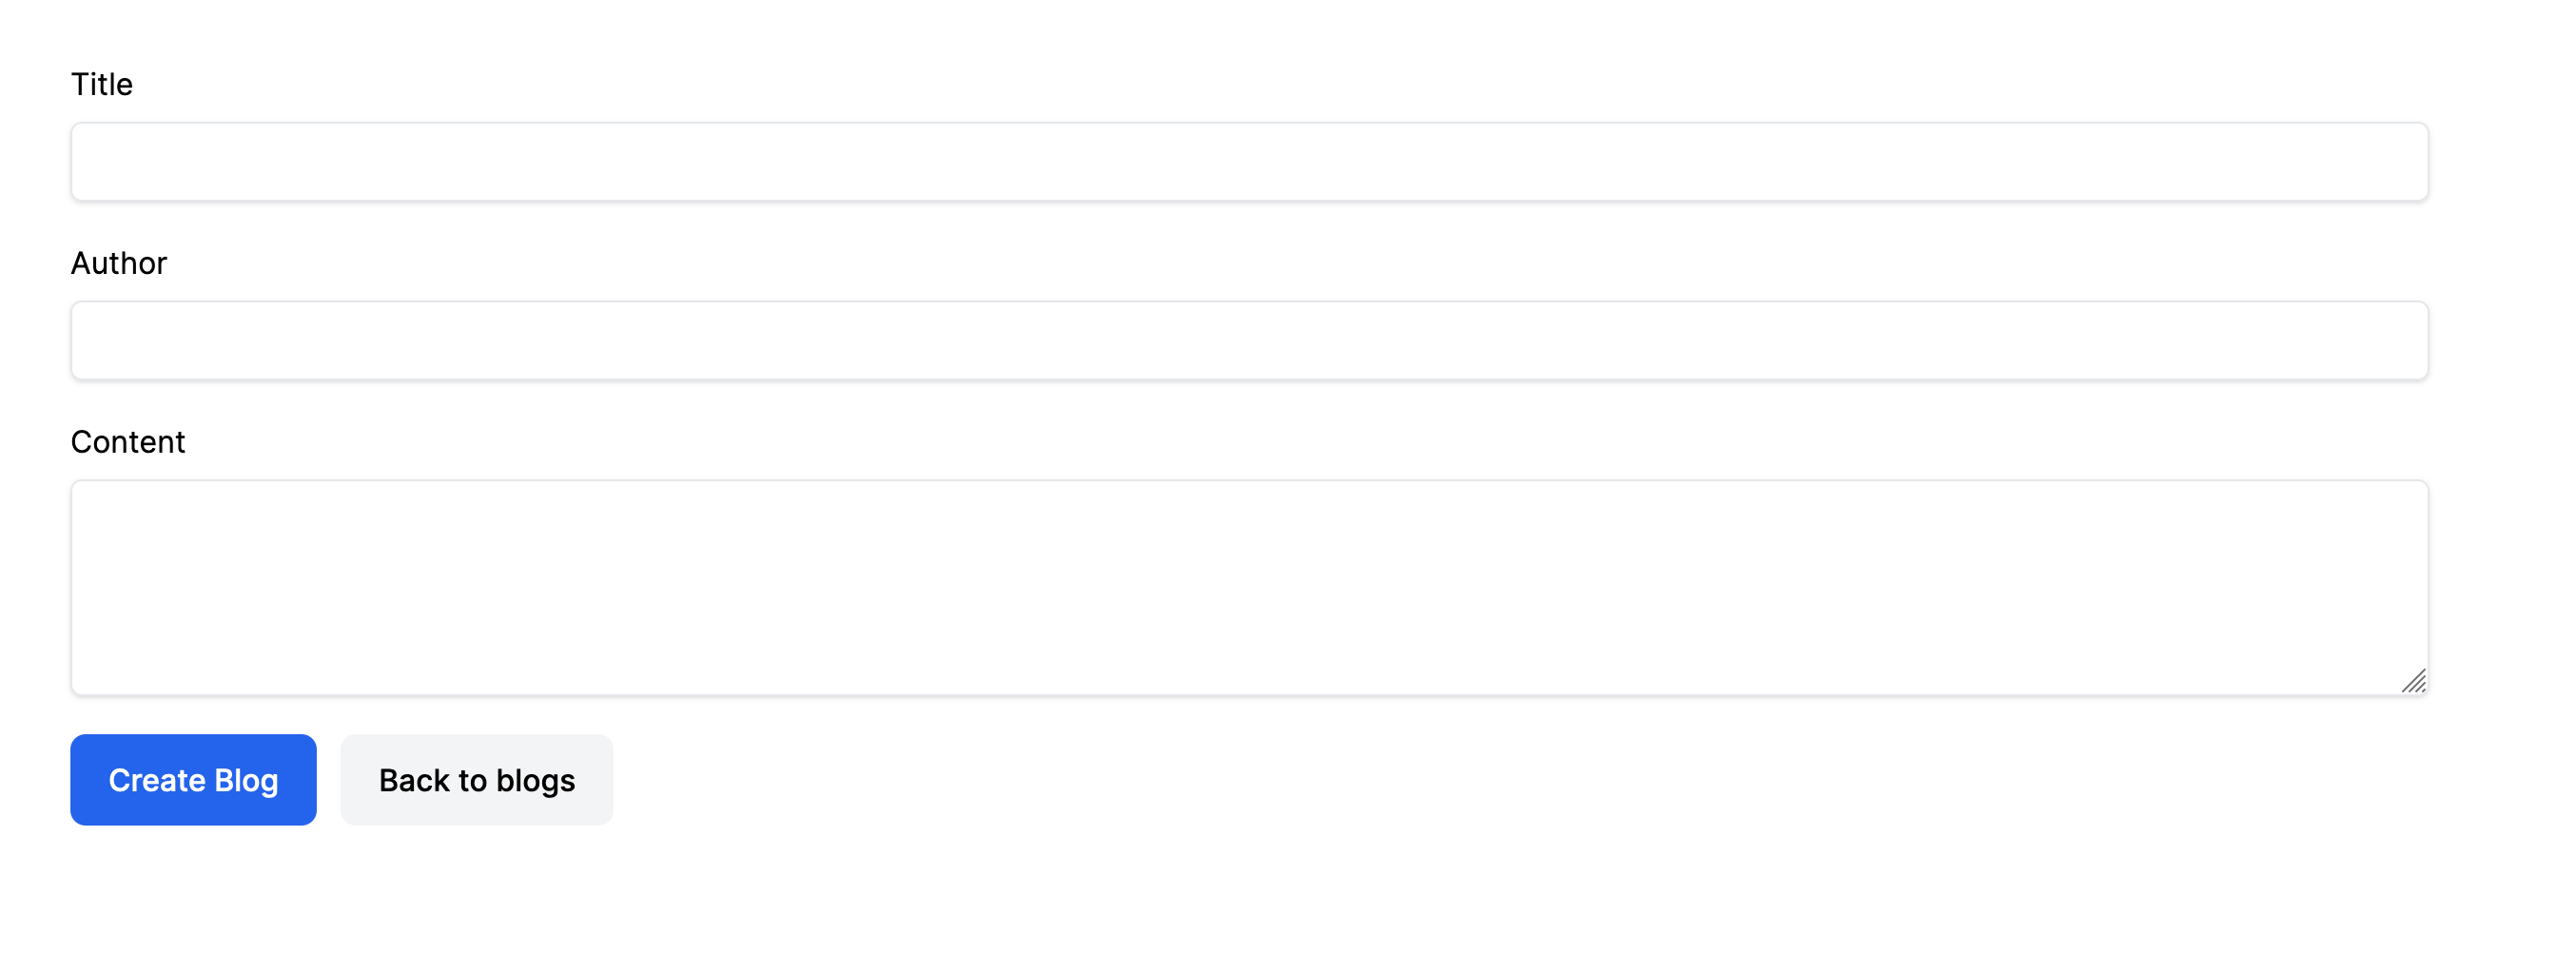
Open the app/views/blogs/new.html.erb file and replace the existing content with the following code:
<div class="mx-auto md:w-2/3 w-full">
  <h1 class="font-bold text-4xl">New blog</h1>
  <%= turbo_frame_tag "create-blog" do %>
    <%= render "form", blog: @blog %>
    <%= link_to "Back to blogs", blogs_path, class: "ml-2 rounded-lg py-3 px-5 bg-gray-100 inline-block font-medium" %>
  <%end%>
</div>
In the above code, we have wrapped the content of the new blog form page using turbo_frame_tag helper function with an unique id create-blog.
Let's go to the browser and click on the New blog button and let's see what happens.
Voila! Magic! The new blog form is loaded inside the create-blog frame without redirecting to the new blog page, everything is happening in the same page. Back to blogs button is also working as expected. It is redirecting to the index page without removing the current turbo frame.
**Note: Only elements inside the turbo_frame_tag are replaced when the frame is updated. The other elements outside the frame are not affected.
Let's create a new blog and monitor the user experience.
So on clicking Create Blog button we are still in the same page but we see Content missing message. But if we refresh the page, we can see the newly created blog in the index page.
Let's check the create action in apps/controllers/blogs_controller.rb file. And see how we are handling the response
def create
  @blog = Blog.new(blog_params)

  respond_to do |format|
    if @blog.save
      format.html { redirect_to blog_url(@blog), notice: "Blog was successfully created." }
    else
      format.html { render :new, status: :unprocessable_entity }
    end
  end
end
Here when blog is created we are redirecting to the show page of the blog. And in apps/views/show.html.erb we are not wrapping any of the elements with turbo_frame_tag. So the content is missing. Our requirement is not to redirect to the show page of the blog, instead we want to show the newly created blog in the index page itself.
Let's make the changes in the create action to redirect to the index page. And let's monitor the user experience.
respond_to do |format|
  if @blog.save
    format.html { redirect_to blogs_path, notice: "Blog was successfully created." }
  else
    format.html { render :new, status: :unprocessable_entity }
  end
end
**Note: Clicking "New Blog" swaps the form out thanks to Turbo Frames, keeping things speedy. But the blog list below stays put. That's because only the form has a special Turbo Frames tag. To see new blogs show up right at the top (prepended), we need to use Turbo Streams.
Let's make this happen!!
Turbo Streams in action (Create)
By default in Rails 7 , form submissions are processed as TURBO_STREAM format on the server.
Turbo Streams are used to update multiple parts of the page in response to an action. Turbo Streams are used to send updates to the client in response to actions that occur on the server.
Step 1: Adding Turbo stream format to the create action
Open the app/controllers/blogs_controller.rb file and update the create action as shown below:
def create
  @blog = Blog.new(blog_params)

  respond_to do |format|
    if @blog.save
        format.turbo_stream { render turbo_stream: turbo_stream.prepend("blogs", partial: "blog", locals: { blog: @blog }) }
        # Fallback for browser with JS disabled
        format.html { redirect_to blogs_path, notice: "Blog was successfully created." }
    else
      format.html { render :new, status: :unprocessable_entity }
    end
  end
end
In the above code, we have added a new format turbo_stream to the respond_to block. When the blog is successfully created, we are rendering a turbo stream response with the prepend action.
The prepend action is used to prepend the newly created blog to the blog list. It takes three arguments:
- The target frame id where the content should be updated. In this case, the target frame id is
blogs. - The partial to be rendered. In this case, the partial is
blog. i.e., the_blog.html.erbpartial. - The local variable to be passed to the partial. In this case, the local variable is
blog.
So when the blog is successfully created, the newly created blog will be prepended to the blog list in the index page. Let's go to the browser and create a new blog and see what happens.
Voila! The newly created blog is prepended to the blog list in the index page thus making user experience seamless and our app perform in real-time.
**Note: A potential improvement can be made to the user experience after creating a new blog entry. Currently, the form remains visible upon successful creation. This could lead to confusion for users who might believe the creation process failed.
To address this concern, we can dynamically update the turbo-frame with the ID create-blog. When the form is initially displayed, its src attribute points to /blogs/new to render the empty form.
Upon successful form submission, we can modify the src attribute to point to /blogs.This will trigger the Turbo Frame to reload its content from the /blogs endpoint, effectively hiding the form and potentially displaying a newly created blog entry list.
<div class="mx-auto md:w-2/3 w-full">
  <h1 class="font-bold text-4xl">New blog</h1>
  <%= turbo_frame_tag "create-blog", src: blogs_path do %>
    <%= render "form", blog: @blog %>
    <%= link_to "Back to blogs", blogs_path, class: "ml-2 rounded-lg py-3 px-5 bg-gray-100 inline-block font-medium" %>
  <%end%>
</div>
Turbo Frames in action (Update)
Let's perform the update action in the same way as we did for the create action.
If we click on the edit button of a blog, we are redirected to the edit page of the blog. Let's make the edit page to be displayed in the index page itself as we did for the new blog page in create action
Now you know what to do, right? Yes, you are right. Let's do it.
- First we want our each blog item to be wrapped with
turbo_frame_tagwith each blog id as the frame id, i.e in_blog.html.erbfile. - When the edit button is clicked, we want the edit page contents to be displayed in the same frame, i.e in
edit.html.erbfile.
Step 1: Wrapping each blog item with turbo frame tag
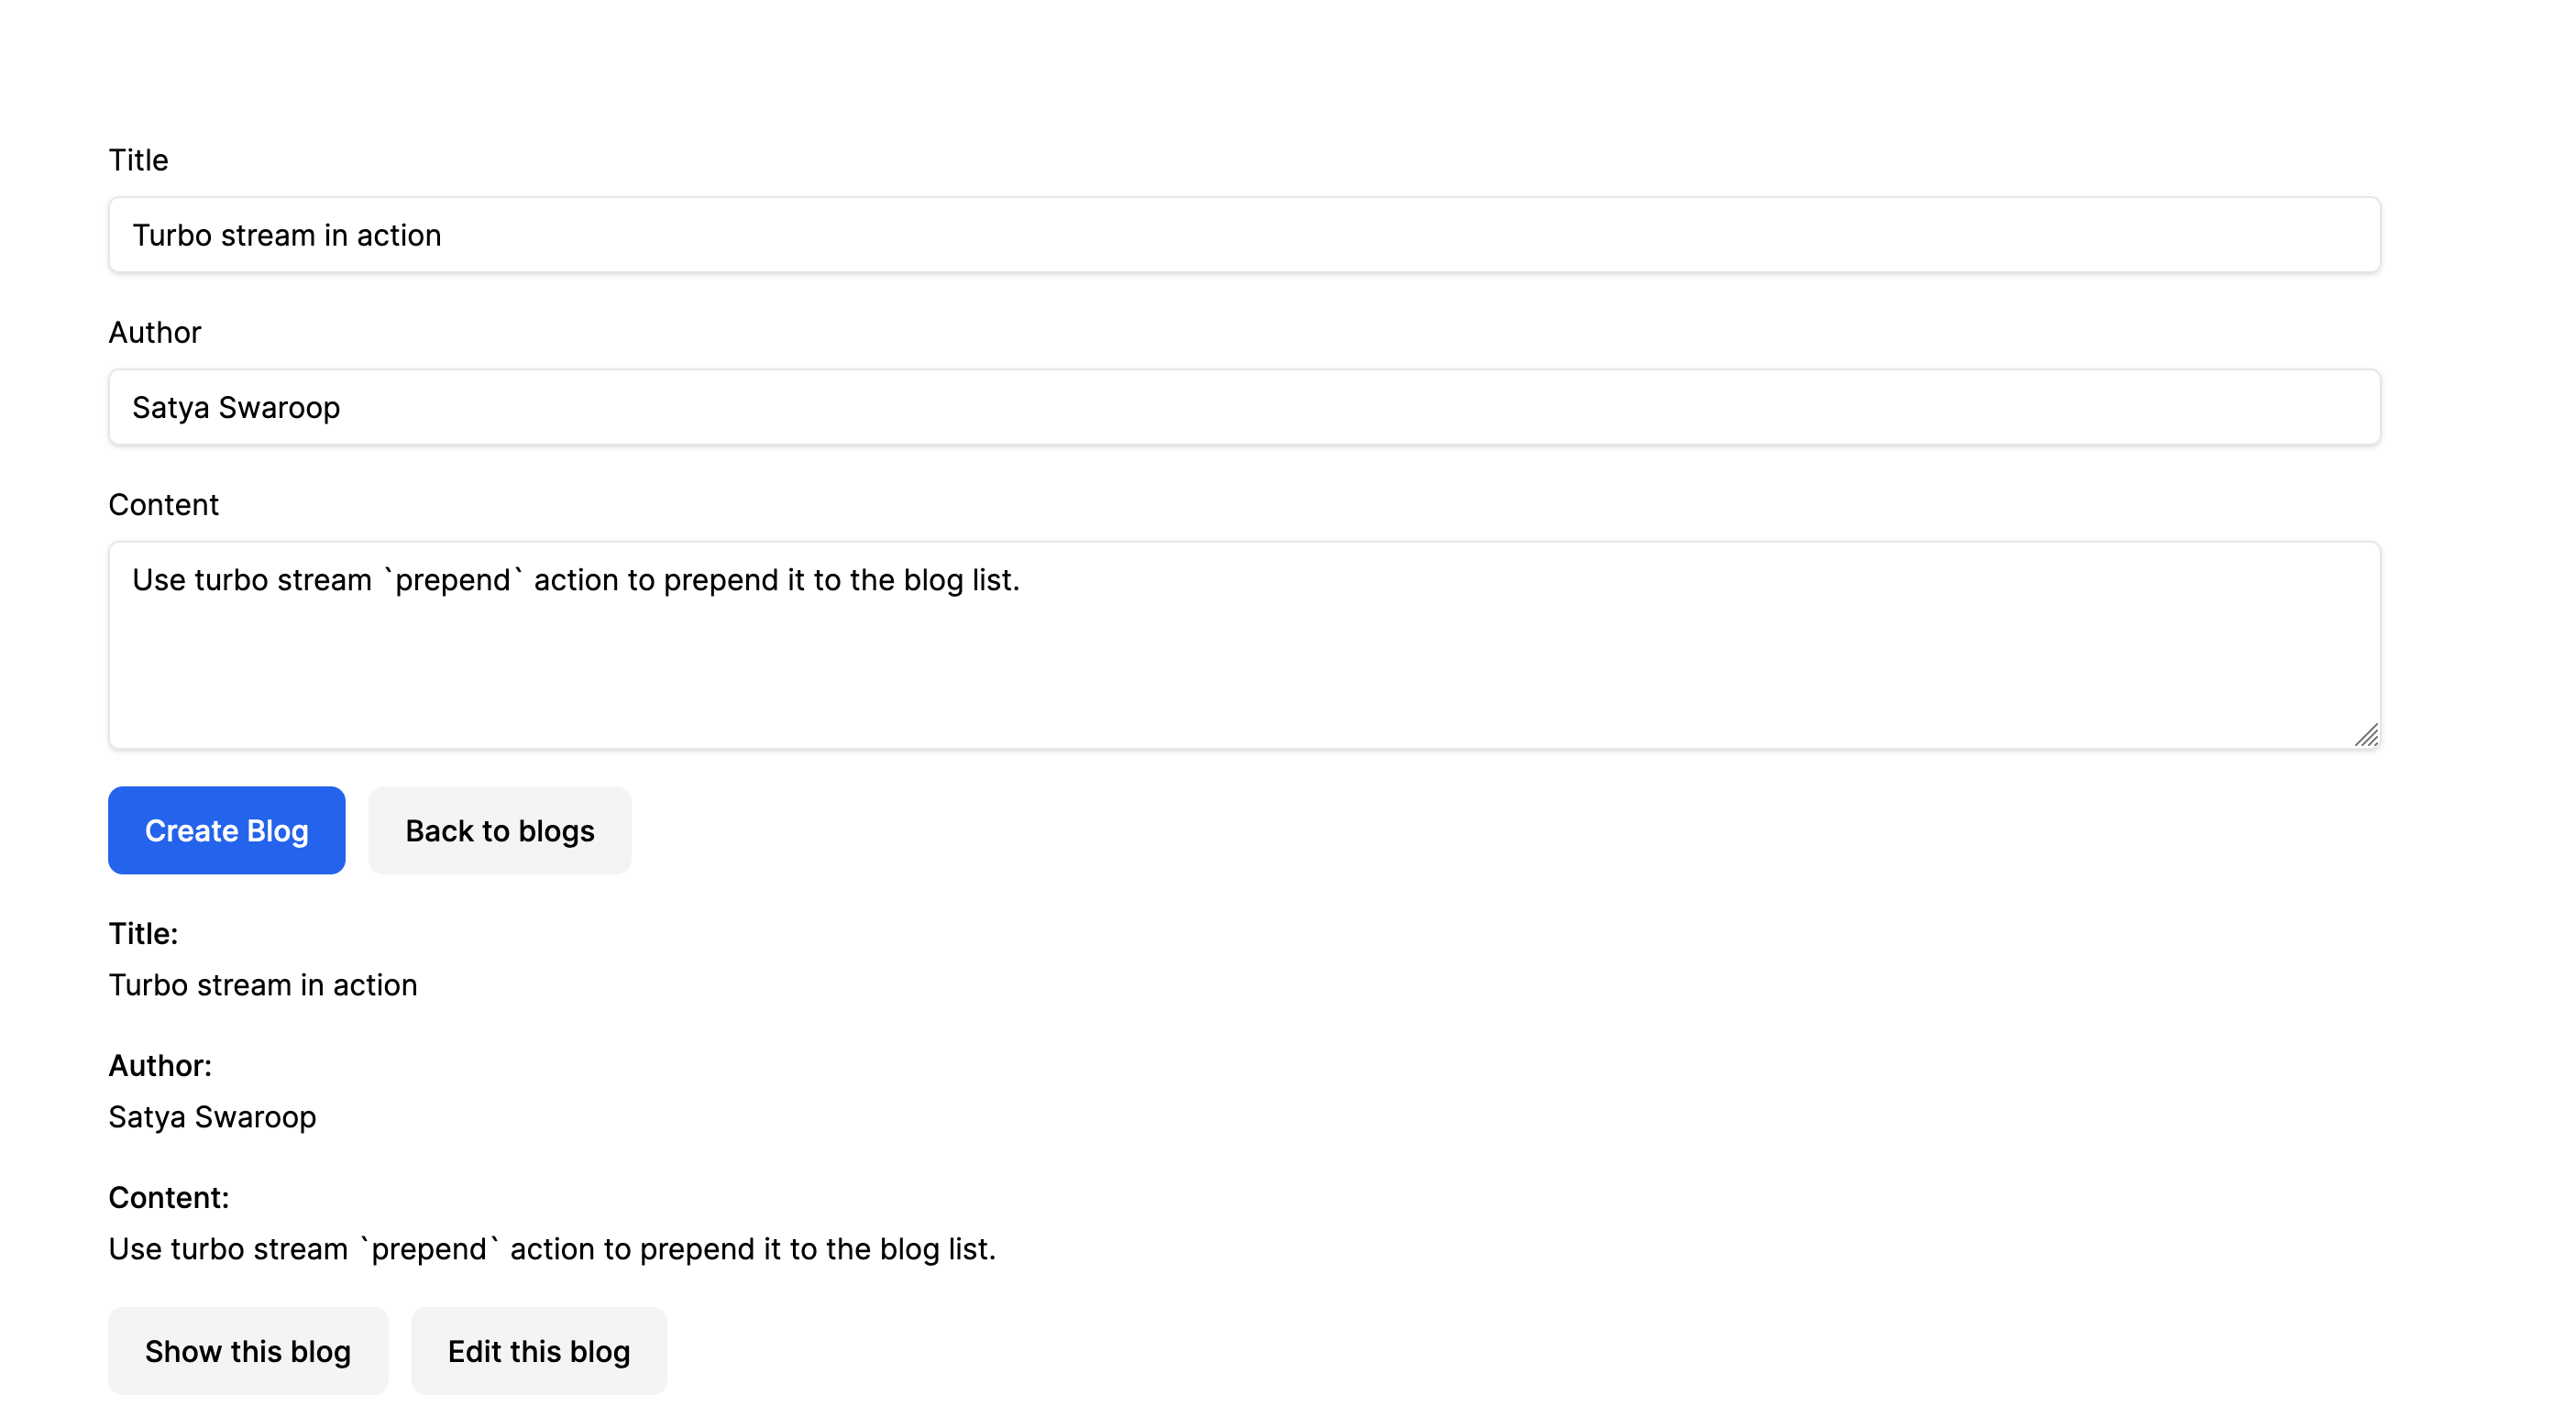
<div id="<%= dom_id blog %>">
  <%= turbo_frame_tag dom_id(blog) do %>
    <p class="my-5">
      <strong class="block font-medium mb-1">Title:</strong>
      <%= blog.title %>
    </p>
    <p class="my-5">
      <strong class="block font-medium mb-1">Author:</strong>
      <%= blog.author %>
    </p>
    <p class="my-5">
      <strong class="block font-medium mb-1">Content:</strong>
      <%= blog.content %>
    </p>
    <%= link_to "Edit this blog", edit_blog_path(blog), class: "rounded-lg py-3 ml-2 px-5 bg-gray-100 inline-block font-medium" %>
    <div class="inline-block ml-2">
      <%= button_to "Destroy this blog", blog_path(blog), method: :delete, class: "mt-2 rounded-lg py-3 px-5 bg-gray-100 font-medium" %>
    </div>
    <hr class="mt-6">
  <%end%>
</div>
In the above code we are using dom_id helper function to automatically assign each blog id. More about dom_id helper function can be found here.
Also one thing here i have removed the show link, as we don't need to show the blog in the same frame, instead have added the delete button. We will see how to handle the delete action in the next section.
Step 2: Displaying the edit page in the same frame
<div class="mx-auto md:w-2/3 w-full">
  <h1 class="font-bold text-4xl">Editing blog</h1>
  <%= turbo_frame_tag dom_id(@blog) do %>
    <%= render "form", blog: @blog %>
    <%= link_to "Back to blogs", blogs_path, class: "ml-2 rounded-lg py-3 px-5 bg-gray-100 inline-block font-medium" %>
  <%end%>
</div>
**Note: I have removed the show page link here also.
Let's perform the edit action and see the magic. The edit page view is displayed in the same frame. This is the power of turbo frames.
But there is a catch here, Although the edit content appears within the same frame, there's an underlying redirect happening in the background.

Here's why:
- Clicking the
Updatebutton in the edit form triggers a form submission. - Based on your routes configuration, the form likely submits a
PATCHrequest to the update action of your blogs controller, targeting a specific blog ID. - The Rails controller processes the update logic, saves the changes to the blog post, and then performs a redirection. This redirection is typically a 302 Found response, instructing the browser to fetch the updated resource (the blog listing page in this case).
- By default, Turbo Streams don't automatically follow redirects. They primarily handle partial updates within the current page.
So, while the edit content appears to update within the frame due to the Turbo Stream rendering, the underlying redirection maintains the browser location at the blogs listing page. So no need to worry about the redirection, Turbo Streams will take care of the rest.
Let's move ahead and see how to handle the destroy action.
Turbo Streams in action (Delete)
Currently when the delete button is clicked, the blog is removed from the list of blogs, but it is loosing the current frame. We want the blog to be removed from the list of blogs without lossing the current frame while also preserving the scroll state.
Let's see how to handle the delete action using turbo streams.
Step 1: Handling the destroy action
In the blogs_controller#destory, update the destroy action as shown below:
def destroy
  @blog.destroy!

  respond_to do |format|
    format.turbo_stream { render turbo_stream: turbo_stream.remove(@blog) }
    # Fallback for browser with JS disabled
    format.html { redirect_to blogs_path, notice: "Blog was successfully destroyed." }
  end
end
In the above code, we are using turbo_stream.remove to remove the blog from the list of blogs. We are just passing the @blog instance variable and turbo_stream.remove will take care of the rest. Isn't it cool 😎 ?
So let's perform all the actions again powered by HOTWIRE.

Stimulus: Coming Up Next
In the next part of this series, we'll delve into Stimulus, the lightweight JavaScript framework that complements Hotwire. Stimulus allows you to define behaviors for specific HTML elements, further enhancing interactivity and user experience without extensive client-side scripting.
References
- Hotwire
- Turbo Frames
- Turbo Streams
- You can refer to the similar code here Github