Evaluating LLM Agents: Building the Design Phase Right
by Adithya Hebbar, System Analyst
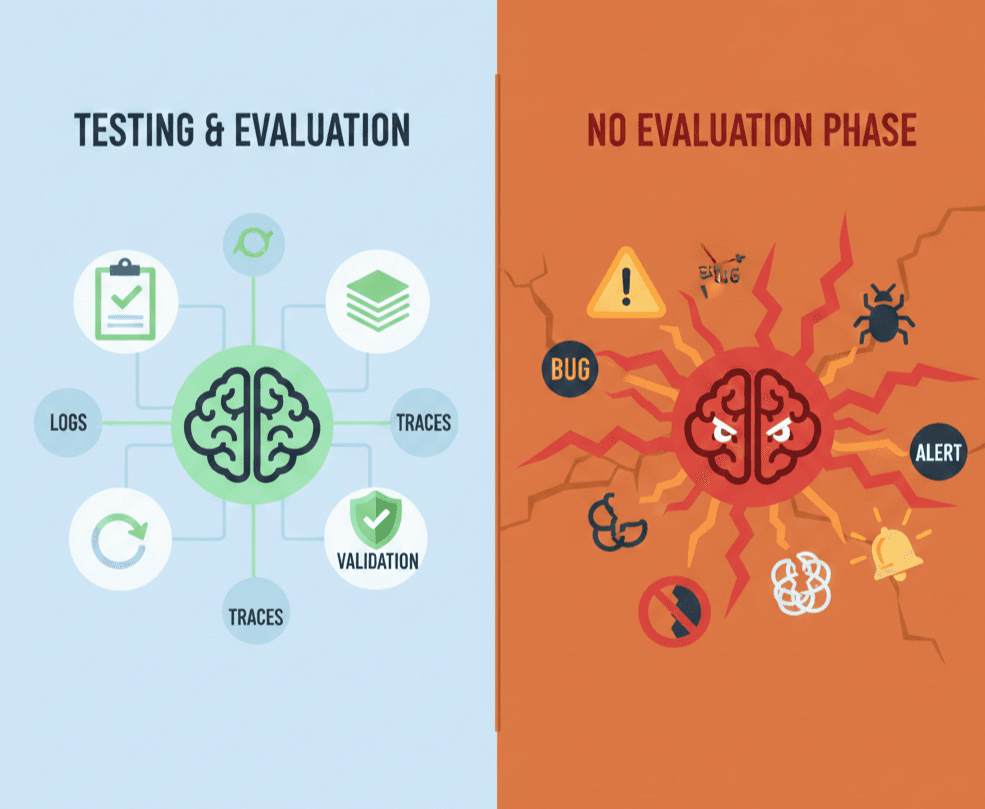
You've built your LLM agent. It works... sometimes. But how do you know it's working? How do you catch regressions before they hit production?
Welcome to the design phase of agent development. In this guide, we'll build a real agent from scratch and walk through the complete workflow: visualization, tracing, and testing.
What We're Building
Let's create an Order Status Agent, a simple bot that checks order status and handles cancellations. It's straightforward enough to understand but complex enough to need proper testing.
Here's the flow:
User Query → Classify Intent → Check Status OR Cancel Order → Generate Response
Step 1: Build the LangGraph Agent
First, let's define our agent structure. We'll use LangGraph to create a graph with conditional routing based on user intent.
TypeScript
// src/agent.ts
import { StateGraph, START, END, MemorySaver } from '@langchain/langgraph';
import { z } from 'zod/v4';

// Define the state schema
const OrderState = z.object({
  userQuery: z.string(),
  intent: z.enum(['check_status', 'cancel_order', 'unknown']),
  orderId: z.string().optional(),
  orderStatus: z.string().optional(),
  response: z.string(),
});

type OrderStateType = z.infer<typeof OrderState>;

// Node: Classify user intent
function classifyIntent(state: OrderStateType): Partial<OrderStateType> {
  const query = state.userQuery.toLowerCase();

  if (query.includes('cancel')) {
    return { intent: 'cancel_order' };
  } else if (query.includes('status') || query.includes('where')) {
    return { intent: 'check_status' };
  }
  return { intent: 'unknown' };
}

// Node: Extract order ID from query
function extractOrderId(state: OrderStateType): Partial<OrderStateType> {
  const match = state.userQuery.match(/ORD-\d+/i);
  return { orderId: match ? match[0].toUpperCase() : undefined };
}

// Node: Check order status (mock implementation)
function checkStatus(state: OrderStateType): Partial<OrderStateType> {
  // In production, this would call your order service
  const mockStatuses: Record<string, string> = {
    'ORD-123': 'Shipped - Arriving tomorrow',
    'ORD-456': 'Processing - Expected ship date: Jan 20',
    'ORD-789': 'Delivered',
  };

  const status = state.orderId
    ? mockStatuses[state.orderId] || 'Order not found'
    : 'No order ID provided';

  return { orderStatus: status };
}

// Node: Cancel order (mock implementation)
function cancelOrder(state: OrderStateType): Partial<OrderStateType> {
  if (!state.orderId) {
    return { orderStatus: 'Cannot cancel: No order ID provided' };
  }
  return { orderStatus: `Order ${state.orderId} has been cancelled` };
}

// Node: Generate final response
function generateResponse(state: OrderStateType): Partial<OrderStateType> {
  if (state.intent === 'unknown') {
    return {
      response:
        'I can help you check order status or cancel orders. Please include your order ID (e.g., ORD-123).',
    };
  }
  return { response: state.orderStatus || 'Unable to process your request' };
}

// Edge: Route based on intent
function routeByIntent(state: OrderStateType): string {
  switch (state.intent) {
    case 'check_status':
      return 'checkStatus';
    case 'cancel_order':
      return 'cancelOrder';
    default:
      return 'generateResponse';
  }
}

// Build the graph
const createOrderGraph = () => {
  return new StateGraph(OrderState)
    .addNode('classifyIntent', classifyIntent)
    .addNode('extractOrderId', extractOrderId)
    .addNode('checkStatus', checkStatus)
    .addNode('cancelOrder', cancelOrder)
    .addNode('generateResponse', generateResponse)
    .addEdge(START, 'classifyIntent')
    .addEdge('classifyIntent', 'extractOrderId')
    .addConditionalEdges('extractOrderId', routeByIntent, {
      checkStatus: 'checkStatus',
      cancelOrder: 'cancelOrder',
      generateResponse: 'generateResponse',
    })
    .addEdge('checkStatus', 'generateResponse')
    .addEdge('cancelOrder', 'generateResponse')
    .addEdge('generateResponse', END);
};

// Export for use
export const graph = createOrderGraph().compile();
export { createOrderGraph, OrderState };
Now we have a working agent. But how do we know it actually works correctly?
Step 2: Visualize with LangGraph Studio
Before diving into tests and traces, let's see our agent in action. LangGraph Studio provides a visual interface to watch your graph execute step by step.
Setting Up Studio
Install the LangGraph CLI:
bash
npm install -g @langchain/langgraph-cli
Create a langgraph.json config file in your project root:
json
{
  "dependencies": ["."],
  "graphs": {
    "order_agent": "./src/agent.ts:graph"
  },
  "env": ".env"
}
Create a .env file:
bash
LANGSMITH_API_KEY=lsv2_your_api_key_here
Launch the development server:
bash
langgraph dev
Now open Studio at https://smith.langchain.com/studio/?baseUrl=http://127.0.0.1:2024
What You Can Do in Studio
- Watch nodes light up as they execute in real-time
- Inspect state at each step — see exactly what
intentwas classified, whatorderIdwas extracted - Hot-reload your code — make changes, see them immediately
- Re-run from any checkpoint — test different paths without starting over
Try running: "Where is my order ORD-123?" and watch the graph flow through classifyIntent → extractOrderId → checkStatus → generateResponse.
This visual feedback is invaluable for understanding why your agent behaves a certain way before you start writing tests.
Step 3: Set Up Tracing with LangSmith
Studio is great for development, but you need traces to understand production behavior. LangSmith captures every execution as a detailed trace.
Configure Tracing
Add these environment variables and LangSmith will automatically start collecting traces:
bash
export LANGCHAIN_TRACING_V2=true
export LANGCHAIN_API_KEY=your-api-key
export LANGCHAIN_PROJECT=order-agent
Every invocation is now automatically captured in LangSmith with:
- Input/Output: The full request and response
- Latency: How long each node took
- Node execution order: The path through your graph
- State changes: What changed at each step
Step 4: Write Unit Tests with Vitest
Fast, deterministic tests are essential for CI/CD pipelines. Let's set up unit tests for our agent using Vitest.
Install Vitest
bash
npm install -D vitest
Test the Full Agent
TypeScript
// tests/agent.test.ts
import { test, expect } from 'vitest';
import { MemorySaver } from '@langchain/langgraph';
import { createOrderGraph, OrderState } from '../src/agent';

test('check order status for valid order', async () => {
  const graph = createOrderGraph();
  const checkpointer = new MemorySaver();
  const compiledGraph = graph.compile({ checkpointer });

  const result = await compiledGraph.invoke(
    {
      userQuery: 'What is the status of ORD-123?',
      intent: 'unknown',
      response: '',
    },
    { configurable: { thread_id: '1' } }
  );

  expect(result.intent).toBe('check_status');
  expect(result.orderId).toBe('ORD-123');
  expect(result.response).toContain('Shipped');
});

test('handle cancellation requests', async () => {
  const graph = createOrderGraph();
  const checkpointer = new MemorySaver();
  const compiledGraph = graph.compile({ checkpointer });

  const result = await compiledGraph.invoke(
    {
      userQuery: 'Please cancel ORD-456',
      intent: 'unknown',
      response: '',
    },
    { configurable: { thread_id: '2' } }
  );

  expect(result.intent).toBe('cancel_order');
  expect(result.response).toContain('cancelled');
});
Test Individual Nodes
LangGraph exposes each node via graph.nodes, letting you test in isolation:
TypeScript
test('classifyIntent detects cancellation requests', async () => {
  const graph = createOrderGraph();
  const compiledGraph = graph.compile();

  // Test the classifyIntent node directly
  const result = await compiledGraph.nodes['classifyIntent'].invoke({
    userQuery: 'I want to cancel my order',
    intent: 'unknown',
    response: '',
  });

  expect(result.intent).toBe('cancel_order');
});

test('extractOrderId extracts valid order IDs', async () => {
  const graph = createOrderGraph();
  const compiledGraph = graph.compile();

  const result = await compiledGraph.nodes['extractOrderId'].invoke({
    userQuery: 'Check ORD-789 status',
    intent: 'check_status',
    response: '',
  });

  expect(result.orderId).toBe('ORD-789');
});
Test Partial Execution
For complex graphs, test specific sections using updateState and interruptAfter:
TypeScript
test('execute only status check path', async () => {
  const graph = createOrderGraph();
  const checkpointer = new MemorySaver();
  const compiledGraph = graph.compile({ checkpointer });

  // Simulate state as if we've already classified and extracted
  await compiledGraph.updateState(
    { configurable: { thread_id: '3' } },
    {
      userQuery: 'Check my order',
      intent: 'check_status',
      orderId: 'ORD-123',
      response: '',
    },
    'extractOrderId' // State as if extractOrderId just completed
  );

  // Resume and stop after checkStatus
  const result = await compiledGraph.invoke(null, {
    configurable: { thread_id: '3' },
    interruptAfter: ['checkStatus'],
  });

  expect(result.orderStatus).toBe('Shipped - Arriving tomorrow');
});
The Complete Design Phase
That's it! Here's the workflow you just learned:
┌──────────────────────────────────────────────────────────────┐
│                    THE DESIGN PHASE                          │
├──────────────────────────────────────────────────────────────┤
│                                                              │
│   1. BUILD → Create your LangGraph agent                     │
│              ↓                                               │
│   2. VISUALIZE → Debug in LangGraph Studio                   │
│              ↓                                               │
│   3. TRACE → Capture executions with LangSmith               │
│              ↓                                               │
│   4. TEST → Write Vitest unit tests for CI/CD                │
│              ↓                                               │
│   5. ITERATE → Fix issues, repeat                            │
│                                                              │
└──────────────────────────────────────────────────────────────┘
Each tool serves a different purpose:
| Tool | Purpose | When to Use |
|---|---|---|
| LangGraph Studio | Visual debugging | Development, understanding flow |
| LangSmith Traces | Observability | Production monitoring, debugging |
| Vitest | Regression testing | CI/CD, fast feedback |
The design phase isn't about achieving perfection on day one. It's about building the infrastructure to iterate towards perfection. With visualization, tracing, and testing, you're not flying blind anymore.
Now go make your agents reliable. 🚀